
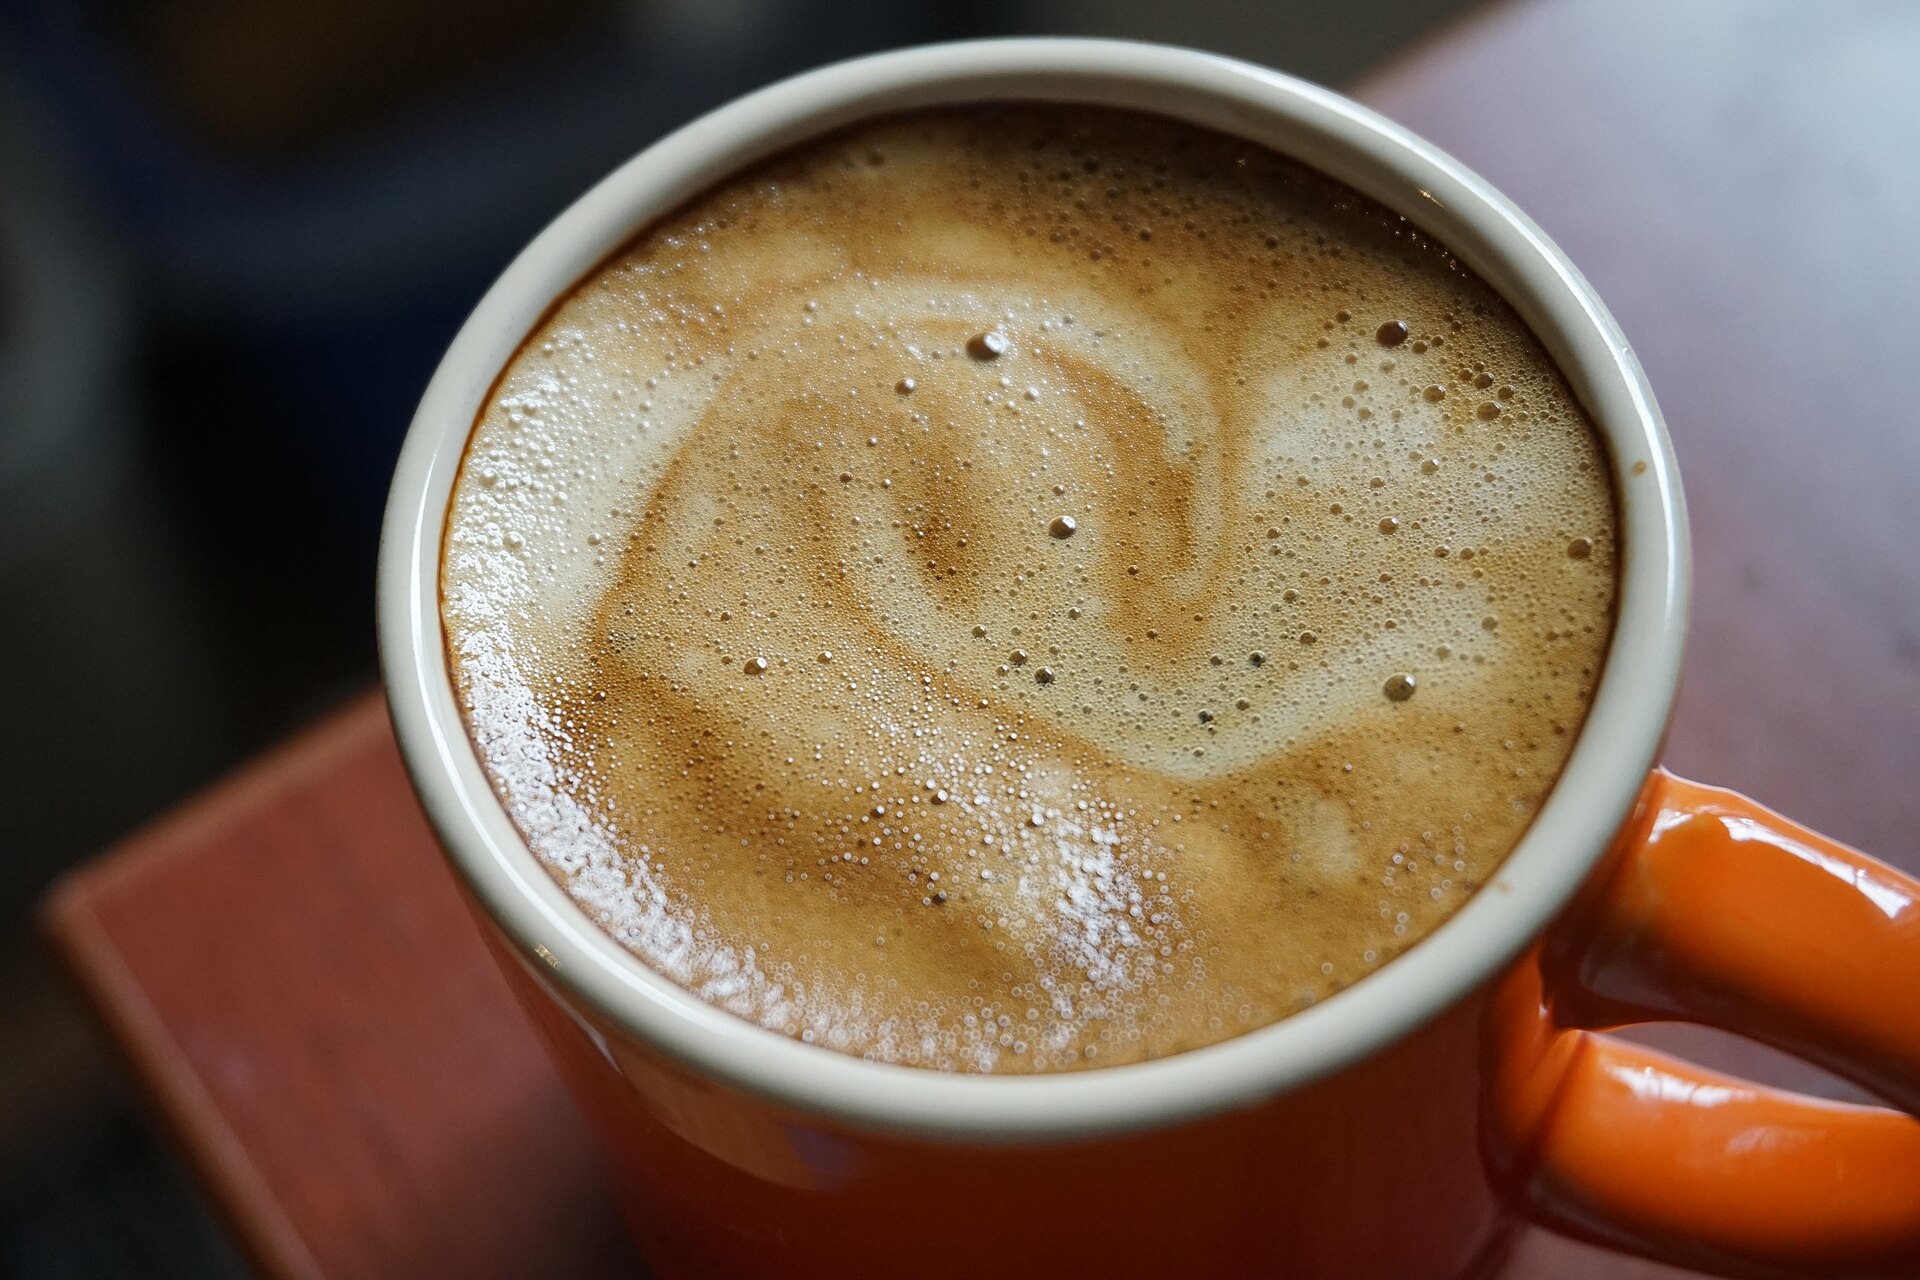
Pull a shot of espresso and watch the top. A golden-brown layer forms in seconds. That layer is the espresso crema, and it is one of the most misunderstood things in coffee. Many people judge a shot by its crema alone. Thick and tan means good. Thin and pale means bad. The truth is more interesting. Here are five common myths, and what actually happens in the cup. What Is Espresso Crema? The Short Answer Espresso crema is the layer of foam on top of a fresh shot. It forms when hot water under high pressure pushes through finely ground coffee. The water picks up carbon dioxide from the roasted beans, plus oils and tiny coffee particles. When the shot leaves the basket and the pressure drops, the gas forms millions of small bubbles, and the oils help hold them together. So crema is a sign that the coffee still holds gas and that the machine built enough pressure. It is not, on its own, a sign of good taste. Let us look at the myths. Myth 1: More Espresso Crema Means Better Taste Crema is a foam. It is made of tiny gas bubbles, mostly carbon dioxide, wrapped in coffee oils. It looks great. But looks and flavor are not the same thing. Crema has a slightly bitter taste for many drinkers. A shot can have a thick layer and still taste harsh or flat. Taste is the real test. Sip the shot, then decide. Myth 2: Thick Crema Always Means Fresh Coffee Fresh roasted beans do hold more carbon dioxide. That gas helps build crema. So old beans often give a thin, pale layer. This part is true. But the link is not perfect. Very fresh beans can give a foamy, uneven layer that fades fast. Dark roasts and robusta beans can also make a thick crema. Robusta is a hardy coffee species with more of the compounds that help foam last. We cover the gas side in our guide to coffee degassing myths. Myth 3: The Machine Makes the Crema Alone Pressure matters. A good machine pushes hot water through the coffee at about nine bars. That force helps the gas and oils mix into foam. Yet the coffee has to do its part. Some home machines use a special pressurized basket. This basket forces a thick foam out of almost any beans, even stale ones. The result looks like crema, but it is more of a trick than a sign of quality. Myth 4: Crema Has Always Been Part of Espresso Early espresso did not have it. Machines in the early 1900s used steam, which gave a thinner drink. The golden layer arrived after the lever machine of Achille Gaggia in the 1940s. Customers loved it, and the look of espresso changed for good. You can follow the full story in our history of espresso, or in this overview of espresso on Wikipedia. Myth 5: You Should Always Stir or Skim the Crema Some baristas stir it in. Others skim it off. Both camps have fans. There is no single rule. Stirring mixes the oils and the liquid, which can make the first sip more even. Skimming can soften bitterness. Try both with the same shot and see what you prefer. Our post on espresso myths covers more of these small debates. Reading Your Crema: A Quick Guide Crema cannot tell you everything, but it can point you in the right direction. Use this table as a starting clue, then taste the shot: What you see Possible cause What to try Pale, thin crema that fades fast Stale beans, grind too coarse, or a shot that ran too fast Use fresher beans, grind finer, check the shot time Very dark, thin crema with a dark ring Grind too fine or a shot that ran too long Grind a little coarser, stop the shot earlier Big bubbles that pop quickly Beans roasted only a day or two ago Let the beans rest a few more days Thick, light crema that lasts a long time Often robusta in the blend, or a pressurized basket Normal for some blends; judge by taste Even, hazel-brown layer with fine bubbles Fresh beans and a balanced shot Keep your recipe, then fine-tune by taste If you need help with grind and timing, our guide on how to dial in espresso walks you through it step by step. For the difference between the two coffee species, read Arabica vs Robusta. Can You Get Crema Without an Espresso Machine? Real crema needs high pressure. An espresso machine works at about nine bars. A classic moka pot brews at only about one to two bars, so it makes a little foam at most, not true crema. We explain the full difference in Moka Pot vs Espresso Machine. There are some tricks. The Bialetti Brikka has a weighted valve that builds a bit more pressure, so it makes a thicker, crema-like foam. Read our Bialetti Brikka review to see how it works. Capsule and pod machines also make crema, because they brew under pressure. For other methods, see how to make espresso without a machine. What to Look for Instead of Crema Use crema as one clue, not the final answer. Look at the color first. A tight, even, hazel-brown layer is a good sign. Then check the time. Most shots run for 25 to 30 seconds. Last, trust your tongue. Sweet, balanced and clean is the goal. Espresso Crema: FAQ Should espresso always have crema? A shot from a pump or lever espresso machine with fresh beans normally has some crema. If there is none at all, the beans are probably old or the grind is far too coarse. Why does my espresso have no crema? The most common causes are stale beans, pre-ground coffee that lost its gas, a grind that is too coarse, or a dose that is too small. Start by buying freshly roasted whole beans and grinding just before brewing.
Why Italians Drink at the Bar: Italian Coffee Bar Rules
Walk into an Italian coffee bar at 8 a.m. and you will notice something. Almost nobody is sitting. People lean on the counter, sip a small espresso in two quick gulps, and leave. Italians call this drinking al banco, which means “at the counter.” It is more than a habit. It is a quiet set of rules that shapes how a whole country takes its coffee. What Does Caffè al Banco Mean? Short answer: caffè al banco means “coffee at the counter.” You order, drink your espresso standing at the bar, and leave. In Italian, banco is the counter and tavolo is the table, so al banco and al tavolo are the two ways to have coffee in a bar. When a barista asks “banco o tavolo?“, they are asking where you will drink. The answer changes the price, the service and how long you stay. Most locals choose the counter, especially in the morning. Why the Italian Coffee Bar Runs on Speed Coffee in Italy is a pause, not an event. A shot of espresso is small, about 30 ml (one ounce). It is hot, and it tastes best in the first minute. So standing makes sense. You drink it while the crema is fresh. Then you get on with your day. The machine set this rhythm. Angelo Moriondo patented an early steam-driven machine in Turin in 1884. Luigi Bezzera and Desiderio Pavoni built on the idea in the early 1900s. The goal was simple: coffee in seconds, not minutes. You can read more in our history of espresso, or in this overview of espresso on Wikipedia. The Price of a Seat Here is the part that surprises visitors. In many bars, the same coffee costs more at a table. The counter price is the low one. A table adds a service charge, because someone brings your order and clears it away. Bars in busy tourist areas often charge the most. Look for the price list near the register before you sit down. If you want to save money and feel like a local, stay at the counter. Unwritten Rules at the Counter Every bar has its own small customs. These are the ones you will meet most often:
Coffee Bloom: The Essential First Step of Great Pour-Over
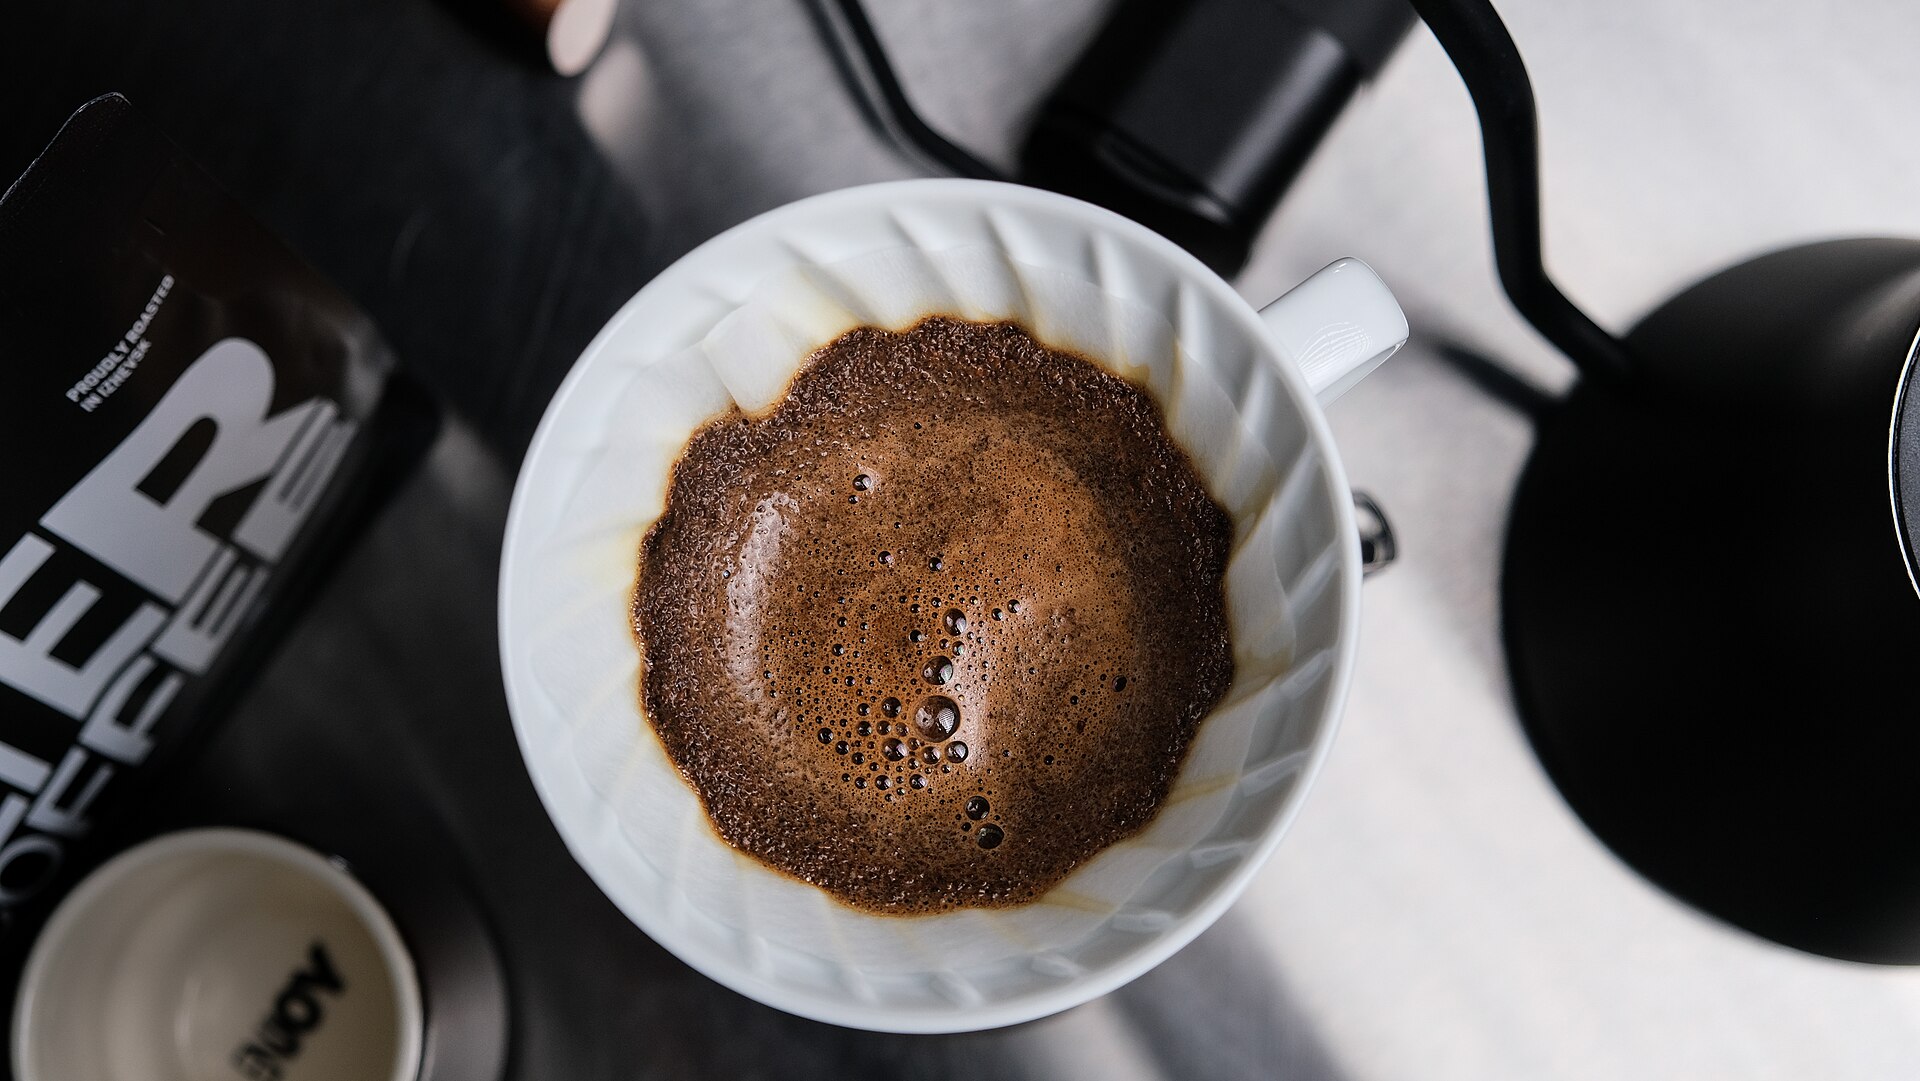
Pour hot water on fresh coffee and something odd happens. The grounds puff up and bubble like a small dome. That is the coffee bloom, and it is the first step of almost every good pour-over. Skip it, and your cup can taste sour and thin. What Is Coffee Bloom? Coffee bloom is the burst of gas that rises when hot water first meets freshly roasted coffee. Roasting traps carbon dioxide inside the beans. Hot water pushes that gas out in a rush of tiny bubbles. Why Coffee Bloom Matters Gas blocks water. If the grounds are still full of carbon dioxide, the water cannot reach all of the coffee evenly. Some parts get too little water and taste sour. Others get too much and taste bitter. A short pause lets most of the gas escape. After that, the water flows through the bed more evenly. The result is a sweeter, clearer cup. Many brewers say the effect is easy to notice with fresh beans. How to Bloom Coffee, Step by Step Rinse the filter. Wet the paper with hot water and empty the carafe or mug. Add the coffee. Use a medium-fine grind, like table salt. Level the bed with a gentle shake. Pour twice the weight of coffee. For 20 g of coffee, pour about 40 g of water. Wet every part of the grounds. Wait 30 to 45 seconds. Watch the bed swell and then settle. Continue the brew. Pour the rest of the water in slow circles. Use water just off the boil, around 93 to 96°C (200 to 205°F). Our guide to coffee water temperature explains why this range works. For a full recipe, see the V60 guide. What the Bloom Tells You A big, bubbly bloom means the coffee is fresh. A flat bloom with little rise often means the beans are old, or were roasted a long time ago. Dark roasts can bubble more than light ones, so use it as a clue and not a verdict. Bloom is not magic, though. Some myths say that bubbles are a sign of quality on their own. They are not. We cover this in our post on coffee degassing myths. Common Coffee Bloom Mistakes Too little water. If dry patches remain, the gas stays trapped. Pouring too hard. A fast stream makes channels in the bed. Waiting too long. After a minute, the bed cools and the cup can turn flat. Skipping a scale. Guessing the water weight makes results hard to repeat. Gear That Helps You do not need much. A simple cone like the Hario V60 ceramic dripper works well. A gooseneck kettle gives a gentle, steady pour, and our guide to the best gooseneck kettles can help you choose. A scale keeps the ratio steady, and you can see our picks in the best coffee scale guide. Coffee Bloom Time and Water by Brew Method The basic rule is the same everywhere: wet all the grounds, then wait. The numbers change a little from one brewer to the next. Use this table as a starting point, then adjust to taste. Brew method Bloom water Bloom time Notes V60 2 to 3 times the coffee weight 30–45 s A gentle swirl helps wet every ground Chemex About 2 times the coffee weight 30–45 s Thick filter, so pour slowly Kalita Wave About 2 times the coffee weight 30–40 s Flat bed blooms evenly AeroPress Just enough to wet the grounds 20–30 s Stir once, then add the rest French press Optional About 30 s Stir the crust before you top up Espresso Pre-infusion inside the machine A few seconds Depends on the machine For a full recipe for each brewer, see our guides to the V60, the Chemex, the Kalita Wave and the AeroPress. The coffee to water ratio guide helps you scale the numbers up or down. Why Is My Coffee Not Blooming? A flat bed is a common worry. Most of the time the cause is simple. Check these points one by one. A weak bloom does not always mean a bad cup. Taste first. If the coffee is sweet and clear, the bloom did its job. Storage matters too: our post on storing coffee explains how to keep beans fresh for longer. How Roast Date Changes the Bloom Coffee roasted one or two days ago is full of gas. The bloom can rise fast and bubble hard, and the cup may taste a little sharp. Many roasters suggest a short rest of a few days before brewing filter coffee. After a few weeks, the bloom gets smaller. So look for the roast date on the bag, not only the best-before date. Fresh, whole beans from a small roaster give the most lively bloom. To see what else changes with time, read our guide to coffee degassing. Does Every Brew Method Need a Bloom? Not always. Pour-over and AeroPress recipes often use one. The French press has a soft bloom when you add the first water. Espresso machines do the same job with a gentle pre-infusion. If you want to read more about brewing styles, the Wikipedia page on coffee preparation is a good start. Frequently Asked Questions How long should a coffee bloom last? Most recipes use 30 to 45 seconds. Very fresh coffee may need a little longer. Can I bloom with cold water? Not for pour-over. Hot water drives out the gas quickly. Cold water would not do that. How much water should I use to bloom coffee? Use about two to three times the weight of the coffee. For 15 g of coffee, that is 30 to 45 g of water. Should I stir the bloom? You can. A gentle stir or swirl helps wet dry clumps. Be soft, so the bed stays level. Does the bloom change the taste? Yes. When the gas leaves first, the water can extract the coffee more evenly. That often means less sourness and a clearer cup. Do I need
AeroPress vs French Press: The Essential Differences
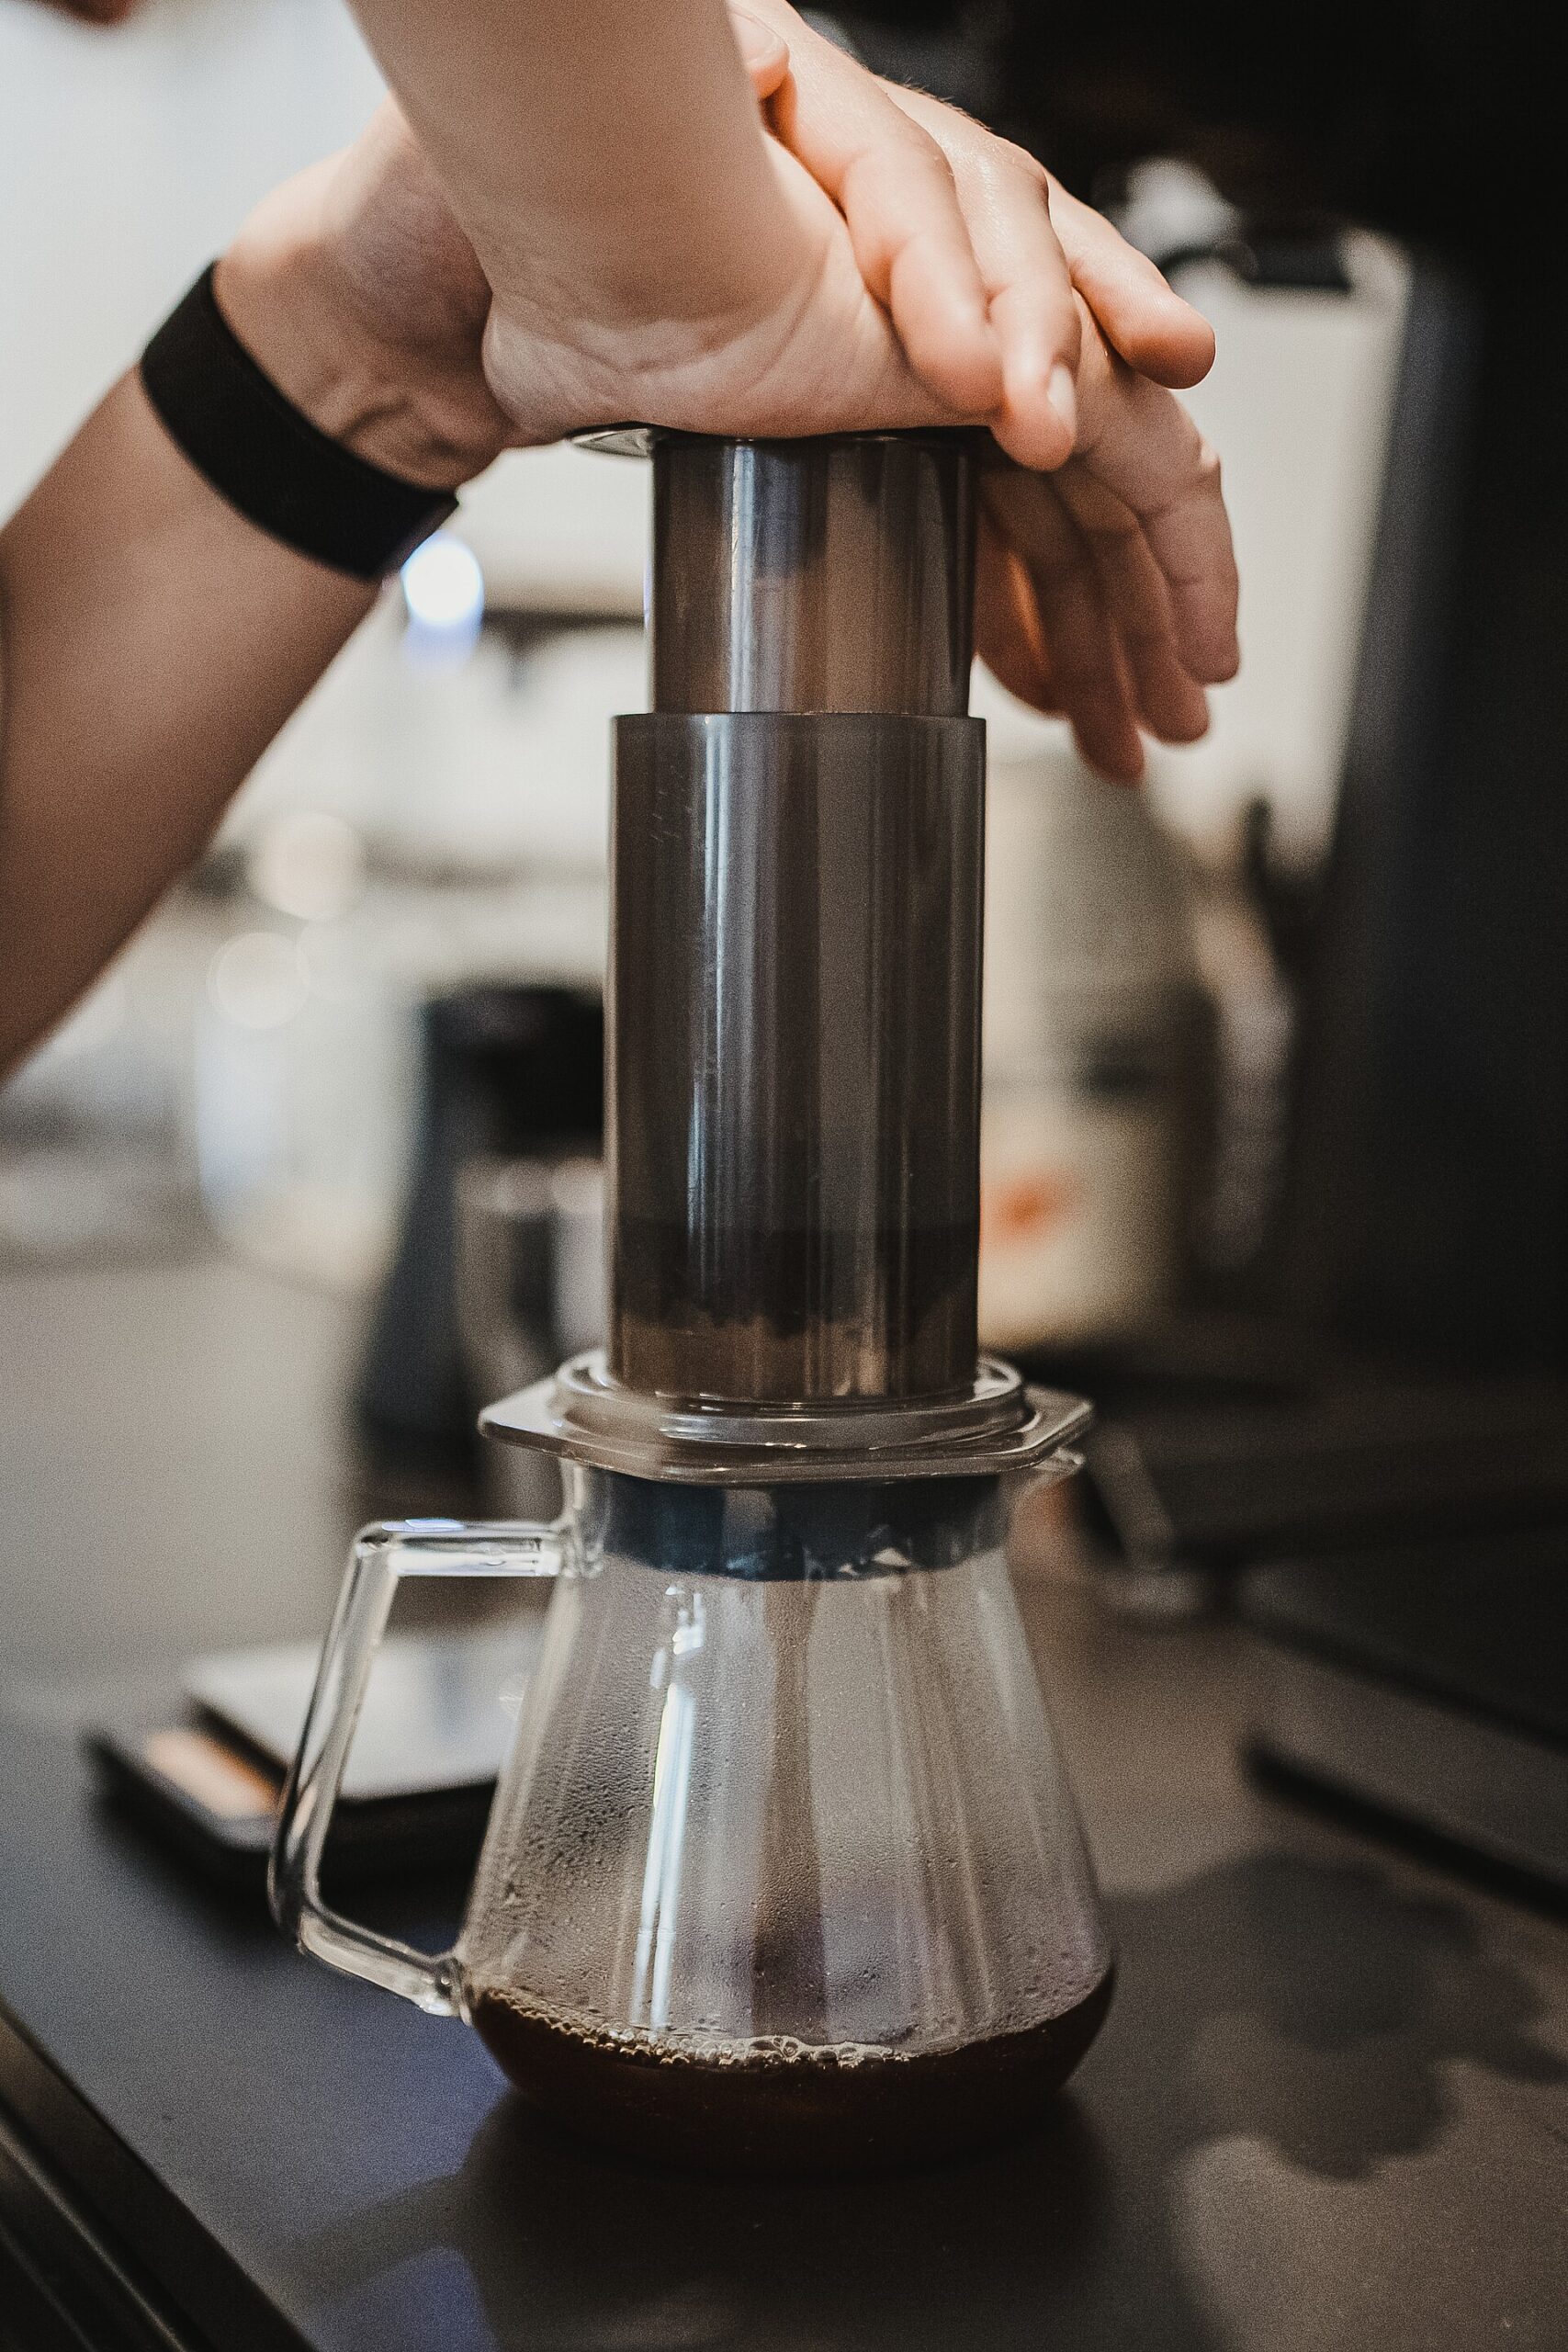
AeroPress vs French press is a fair fight. Both are cheap, both are simple, and both make a good cup at home. But they work in different ways, and the coffee in your mug will taste different. Here is how to pick the one that suits you. The Short Answer Pick the AeroPress if you like a clean, bright cup, brew for one or two, or travel a lot. Pick the French press if you like a rich, heavy cup, brew for a few people, and want an easy routine. Neither one is better. They just do different jobs. How Each Brewer Works The French press is an old idea. You steep coarse coffee in hot water for about four minutes. Then you push a metal mesh plunger down to hold the grounds at the bottom. You can read the basics in the Wikipedia entry on the French press. The AeroPress is much newer. It was made by Alan Adler and first sold in 2005. You mix finer coffee with water in a plastic chamber, wait a short time, then press the plunger. The coffee drips through a small paper filter into your cup. See also the Wikipedia entry on the AeroPress. Taste: Clean or Rich? The filter is the big difference. A paper filter traps oils and fine bits. So the AeroPress gives a clean, bright cup with clear flavor notes. A metal mesh lets oils and a little silt pass through. So the French press gives a heavier, rounder cup with more body. Reviewers often say the AeroPress shows fruit and floral notes better. They say the French press suits chocolate and nut flavors. Both claims depend on your beans and your grind, so treat them as a guide and not a rule. Ease, Speed and Cleanup Speed: the AeroPress takes about two minutes. The French press takes about four to five. Skill: the French press is very forgiving. The AeroPress has more settings to play with, such as time, grind and water temperature. Cleanup: the AeroPress pops out a neat puck of grounds. The French press leaves wet grounds that you must scoop and rinse. Mistakes: a French press cup can turn gritty if the grind is too fine. An AeroPress cup can turn sour if you press too fast. Batch Size and Travel The AeroPress makes one or two small cups at a time. It is light and does not break, so it is great for trips and camping. A French press makes three to eight cups, depending on size. It is a better fit for a family or a slow weekend brunch. The glass one can crack, so many people choose steel. Grind Size and Beans The French press wants a coarse grind, close to sea salt. The AeroPress works with a medium to fine grind, and it can handle more styles. Whichever you pick, a good burr grinder helps more than the brewer does. Our guide to coffee grind size shows what to aim for. AeroPress vs French Press at a Glance Here are the main differences side by side. Times and grind sizes are typical starting points, not strict rules. AeroPress French press Brew time About 2 minutes About 4 to 5 minutes Filter Paper (metal optional) Metal mesh Grind Medium to fine Coarse Body Light and clean Full and rich Batch size One or two small cups Several cups, by size Cleanup Press out a dry puck Scoop and rinse wet grounds Travel Light and hard to break Bulky; glass can crack Running cost Paper filters No filters needed Starter Recipes for Each Brewer AeroPress starter recipe If the cup tastes sour, grind a little finer or steep a little longer. If it tastes bitter, do the opposite. French press starter recipe Some brewers wait longer, skim the foam off the top, and then press only to the surface. This gives a cleaner cup with less silt. Do not leave the coffee sitting on the grounds, or it will keep brewing and turn bitter. Our coffee to water ratio guide shows how to scale both recipes. Paper Filter vs Metal Filter: Does It Matter for Health? It can. Coffee beans contain oils called diterpenes, such as cafestol. A paper filter holds most of them back. A metal mesh lets them through. According to the Harvard T.H. Chan School of Public Health, these compounds in unfiltered coffee can raise LDL cholesterol. For most people, the odd cup of French press is not a concern. But if you drink several cups a day and watch your cholesterol, paper-filtered coffee is the safer habit. Ask your doctor if you are unsure. Read more in our post on coffee and heart health myths. Which One Should You Buy? Here is a simple way to choose, based on published specs and what owners report in reviews. Choose the AeroPress Original if you drink alone, want a clean cup, and like to tweak recipes. Choose a Bodum Chambord or a similar French press if you serve several people and love a full body. If you can only have one, many home brewers start with the French press for its ease, then add an AeroPress later. We have not tested either brewer ourselves. This comparison draws on manufacturer specs and on what long-term owners say in reviews and forums. Want the full recipes? Read our AeroPress guide and our French press guide. Frequently Asked Questions Is the AeroPress stronger than a French press? It can be. You can brew a small, strong concentrate with it. But a French press with the same ratio gives a cup of equal strength, just with more body. Do I need paper filters for the AeroPress? Yes. The paper filter is what gives the clean taste. Metal filters exist, but they change the cup. Can you make espresso with an AeroPress? Not real espresso. An espresso machine pushes water at about 9 bar of pressure, and you cannot reach that by hand. But

El Salvador Coffee: 6 Essential Facts About a Bourbon Gem
El Salvador coffee is the quiet star of Central America. The country is small, but its volcanic slopes grow some of the sweetest, cleanest cups you can find. It is a great origin for anyone who likes balanced coffee with gentle fruit and chocolate notes. Here are six things worth knowing before you buy your next bag. Notes on flavor vary by farm and roast, so treat them as typical ranges, not promises. 1. El Salvador coffee grows on volcanoes Most coffee here grows in the west of the country. The best-known area is Apaneca-Ilamatepec, a mountain chain with volcanic soil. Altitude and cool nights slow the cherry down, and that tends to build sweetness and acidity. 2. Bourbon is the backbone Many sources say Bourbon makes up most of the crop. This old Arabica variety is often described as sweet and clean, with soft citrus acidity. If you want to understand varieties better, read our guide to Arabica coffee varieties. 3. Pacas and Pacamara were born here Pacas is a natural mutation of Bourbon, found in El Salvador. Pacamara is a cross between Pacas and Maragogipe, developed by researchers over many years. It is known for large beans and a creamy body. Pacamara is often described with notes of chocolate, ripe fruit, and caramel. It can be bold and a little wild, so roasters love to show it off. 4. Washed is common, but not the only way Most El Salvador coffee is washed, which gives a clean cup. Honey and natural lots exist too, and they add more fruit and body. Our post on coffee processing methods explains the difference in plain words. 5. Specialty took off in the early 2000s Specialty buyers began to pay more attention to the country in the 1990s and 2000s. The Cup of Excellence competition, which came to El Salvador in 2003, helped farms earn global fame. Today you will find rare varieties here too, such as Geisha. Where Coffee Grows in El Salvador: The Six Regions El Salvador is the smallest country in Central America, but it has six recognised coffee regions. Most of them sit on the slopes of a volcano or a mountain range: Two details make the country special. First, shade: most Salvadoran coffee grows under the cover of taller trees, which protects the soil and slows ripening. Second, timing: the harvest usually runs from about October to March, and higher farms pick later. That is why fresh Salvadoran lots tend to reach roasters in spring and summer. A Short History: From Coffee Boom to Specialty Coffee shaped El Salvador for more than a century. For a long time it was the main export and one of the biggest sources of income in the country. Political crisis and civil war in the 1980s hit farms hard, and many lost money and people. Research kept going, though. In 1958 scientists at the Salvadoran coffee research institute (ISIC, now closed) began the experiments that led to Pacamara. Decades later, this large-bean hybrid became one of the stars of specialty coffee competitions. The biggest recent shock was coffee leaf rust, a fungus that attacks the leaves. During the outbreak of 2012 and 2013, production fell dramatically: Coffee Review reports a drop of about 60% from the 2012–13 to the 2013–14 harvest. Many farms replanted with new varieties, while others focused on small, high-quality lots for specialty buyers. What does El Salvador coffee taste like? Flavor depends on variety, farm, and process. Still, a few notes come up again and again. Bourbon lots are often sweet, with orange or red apple and a clean finish. Pacamara lots can show stone fruit, milk chocolate, and caramel, with a round and creamy feel. Natural lots may lean toward berry and tropical fruit. Washed lots tend to be tidy and bright. If you are new to the origin, start with a washed Bourbon. It is the easiest way to learn what makes El Salvador coffee special. How to choose a good bag Look for a clear roast date, a named farm or cooperative, and the variety on the label. Small roasters often share this detail because they care about it. Pick whole beans, and grind just before you brew. Freshness matters, but very new coffee needs a few days to rest. Ask your roaster how they roasted the lot. A lighter roast shows more fruit. A medium roast adds chocolate and body. Both can be lovely, so choose the style you enjoy most. 6. How to brew El Salvador coffee Its balance makes it easy to enjoy. A pour-over shows off the sweet fruit and soft acidity. A V60 dripper is a good start. Try water just off the boil and a medium grind. For a classic Italian cup, a medium roast on the moka works well. A moka is the small stovetop pot found in most Italian homes. Chocolate and caramel notes come forward in that style. For a deeper look at the region, see this overview of coffee production in El Salvador. El Salvador vs Other Central American Coffees If you already know other origins from the region, this quick comparison can help. These are typical profiles, not rules: farm, variety, process and roast change the cup a lot. Origin Typical cup Read more El Salvador Sweet, balanced, soft citrus, milk chocolate; creamy with Pacamara You are here Guatemala (Antigua) Chocolate, spice, fuller body Antigua Guatemala coffee Honduras Sweet caramel, gentle fruit, mild acidity Honduras coffee Costa Rica Bright, clean, often honey processed Costa Rica coffee A Simple Pour-Over Recipe for El Salvador Coffee This easy starting point works well for a washed Bourbon or Pacamara. Adjust it to your taste. That is a ratio of about 1:16. If you want a stronger cup, read our guide to the coffee to water ratio. El Salvador Coffee: FAQ Is El Salvador coffee good? Yes. It is known for sweet, balanced and clean cups, and its Pacamara and Bourbon lots often do well in
Coffee Degassing: 5 Surprising Myths About Fresh-Roasted Beans
You bring home a bag of beans roasted yesterday. You grind them, pull a shot, and it tastes sharp and thin. What went wrong? The answer is coffee degassing. Fresh roasted beans are full of gas, and that gas changes how coffee brews. Many people think fresher is always better. That is only half true. Here are five myths about coffee degassing, with short answers you can use at home. In Italy, a small roaster is called a torrefazione, and good ones know this well. What is coffee degassing? Roasting creates carbon dioxide (CO2) inside the bean. After roasting, the beans slowly release it. This is coffee degassing. It starts right away and can last for weeks, depending on the roast and the bean. The gas matters because it pushes against water. Too much gas can make the brew uneven. As the gas fades, the coffee tastes clearer and more balanced. Myth 1: The fresher the coffee, the better the cup Very fresh coffee is not at its best. Right after roasting, the beans are still gassy. Espresso is the most sensitive. Many roasters suggest waiting about one to two weeks before pulling shots, though the exact number varies by roaster and bean. Wait too long, and the other side appears. Oxygen slowly dulls the flavor. The sweet spot sits in between. Taste a cup every day or two and note when it peaks. Myth 2: Lots of crema means the coffee is good Crema is the golden foam on an espresso. It looks great, but it is not proof of quality. Fresh beans release lots of CO2, and that gas can create a thick, bubbly crema. It can also lead to sour or uneven shots. Judge the cup by taste, not by foam. If you want to fix a sour shot, our guide to dialing in espresso is a good next step. Myth 3: Dark and light roasts degas the same way They do not. Dark roasts are more porous, and they usually let go of gas faster. Light roasts are denser. They tend to hold gas longer, so they often need more rest. This is one more reason light roasts can taste harsh when brewed too early. Learn more in our light vs dark roast comparison. Myth 4: Filter coffee needs the same rest as espresso Not quite. Filter methods, like V60 or AeroPress, handle gas better. The water has time to flow, and the paper filter stays open. Many people find filter coffee tastes good a few days after roasting. Espresso is different. High pressure meets a tight bed of coffee, so extra gas can cause channeling. That is why espresso usually likes a longer rest. Myth 5: A bag with a valve means the coffee is fresh The little round valve on many bags is a one-way door. It lets CO2 escape and keeps air out. That helps protect the beans. But it says nothing about how long ago they were roasted. Always look for the roast date, not the best-before date. A roast date tells you exactly where your coffee sits on its degassing curve. Once the bag is open, keep the beans in an airtight canister away from light and heat. How Long Should Coffee Degas? Rest Times by Brew Method There is no single right number. Roast level, bean density and storage all play a part. Still, these ranges are common starting points used by roasters and baristas. Count the days from the roast date on the bag. Brew method Common rest after roasting Why Espresso About 7 to 14 days, sometimes longer High pressure makes gas cause uneven, sour shots Pour-over and filter About 3 to 10 days Too much gas pushes water away from the grounds French press and AeroPress About 2 to 7 days Immersion is more forgiving of fresh beans Cold brew Fresh or rested both work Long steeping hides most gas effects Darker roasts are more porous and usually need less rest. Light roasts are denser and often taste better after a longer rest. See our AeroPress vs French Press guide for more on immersion brewing. Signs Your Coffee Is Too Fresh or Too Old Your cup can tell you a lot. Look out for these signs. How to Store Beans While They Degas Keep the beans whole. Grinding releases gas and aroma very fast. Leave them in a bag with a one-way valve, or in an airtight jar, away from light, heat and moisture. Avoid opening and closing the container all day long. Buy amounts you can finish in a few weeks. For more on what helps and what does not, read our guide to coffee storage myths. A simple coffee degassing routine Here is an easy plan. Check the roast date. Let espresso beans rest about a week or more. Brew filter coffee a few days after roasting. Then taste and adjust. A coffee scale helps you repeat what works. For the science of roasting, see this overview of coffee roasting, and our post on roasting myths. Coffee degassing is not a flaw. It is part of how coffee grows into its best flavor. Give your beans a little time, and they will pay you back in the cup. At IndieRoastersItaly, we are building a home for small, independent Italian roasters. If you love coffee that is roasted with care, visit our homepage and join the waitlist. Coffee Degassing FAQ Do you need to degas coffee beans yourself? No special steps are needed. Degassing happens on its own. You only need to give the beans a few days of rest before you brew. How can I tell if my coffee has degassed? Watch the bloom. When you pour the first bit of hot water, fresh coffee rises and bubbles a lot. As the beans age, the bloom gets smaller. Does ground coffee degas faster? Yes, much faster. Grinding opens up the bean, so gas and aroma escape within minutes. This is why it is best
Marocchino Coffee: 5 Surprising Facts About Italy’s Cocoa Espresso
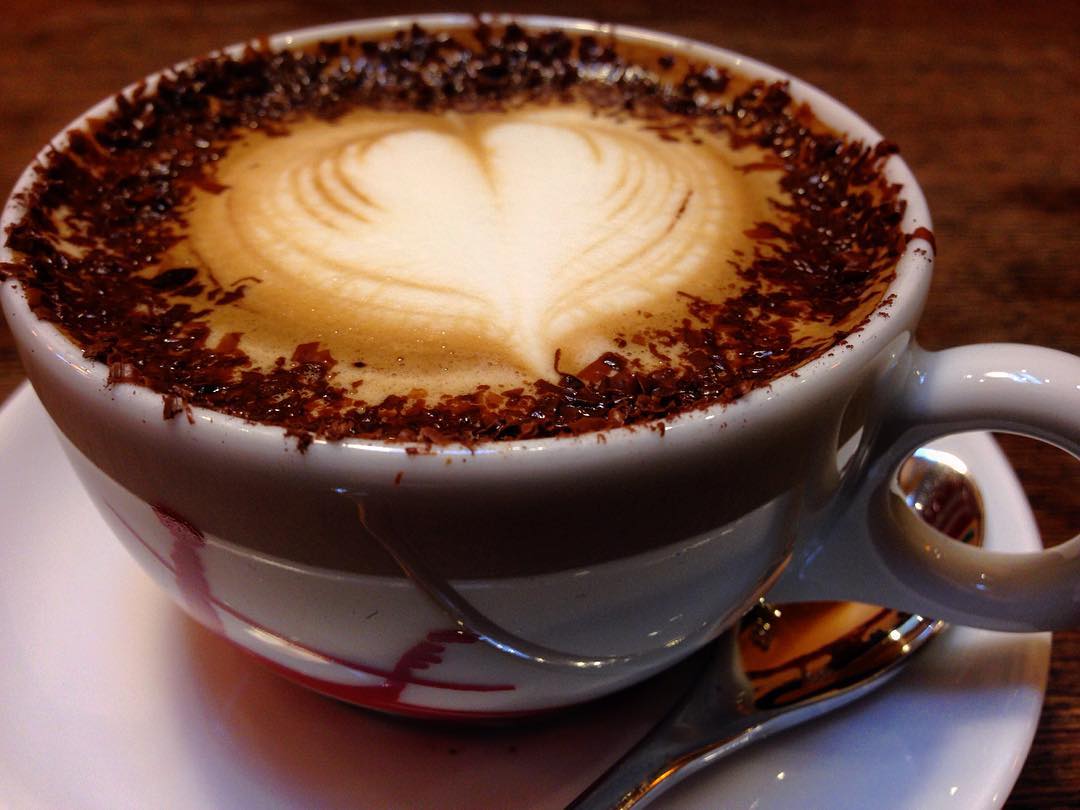
Marocchino coffee is a tiny drink with a big story. It is a small glass of espresso, milk foam and cocoa powder. Italians drink it at the bar in a few quick sips. (In Italy, a “bar” is the local café.) Here are five facts that explain where it comes from and why it still works. Marocchino coffee was born in Alessandria Most accounts place the birth of the drink in Alessandria, a city in Piedmont, in northern Italy. The usual story names Bar Carpano, a café across from the Borsalino hat factory. The exact date is unclear. Some sources say the 1930s. Others say earlier, or just after World War II. The name comes from hat leather Marocchino means “Moroccan” in Italian. It is also the name of a soft leather. Borsalino used it for the inner band of its famous felt hats. The light brown of the drink looked like that leather. This is the most common explanation, but it is not the only one. You can read more about the Borsalino brand on Wikipedia. A cousin of the Turin bicerin Piedmont loves coffee and chocolate together. The bicerin of Turin is older. It layers espresso, chocolate and cream in a small glass. Many writers see the marocchino as a lighter and quicker relative. If you like the idea, read our story of the bicerin. How a marocchino is built The build is simple. The barista dusts cocoa powder on the inside of a small glass. Then comes a shot of espresso. A spoon of hot milk foam goes on top, with more cocoa. Some bars add a little hot chocolate. Recipes change from bar to bar, and that is part of the charm. Not a mini cappuccino People often call it a small cappuccino. That is not quite right. A cappuccino has much more milk, as our guide to the history of the cappuccino shows. The marocchino keeps the espresso in front. The cocoa adds sweetness, but the coffee still leads. That is why the coffee matters. A flat, bitter shot will fight the cocoa. A sweet and balanced espresso makes the drink shine. This is where a fresh, small-batch roast helps. Our piece on the history of espresso explains how the shot itself became the heart of the Italian bar. How to order and enjoy it In Italy, you usually order at the counter and drink standing up. Say “un marocchino, per favore.” In some busy bars you pay at the till first and show the receipt to the barista. Drink it while the foam is warm. Some people stir the cocoa in. Others sip through the layers. Both ways are fine. You can also make a marocchino coffee at home. Pull a short espresso, or brew a strong shot in a moka pot (the classic Italian stovetop maker). Froth a little milk. Dust cocoa in a small glass, pour the coffee, then add the foam. Use unsweetened cocoa, so the sugar stays low and the coffee stays clear. What Is a Marocchino Coffee? The Short Answer A marocchino is a small Italian coffee drink made with three things: espresso, milk foam and cocoa. It is served in a small glass, not a cup, so you can see the layers. It is sweet from the cocoa, but it is not a dessert. The espresso is still the main voice. The drink is most common in northern Italy, above all in Piedmont, where it was born. Today many bars in other Italian cities make it too, and specialty cafés abroad often add it to the menu. Marocchino vs Mocha vs Bicerin vs Cappuccino These four drinks are often mixed up. They share coffee and milk or chocolate, but the balance is very different. This table shows the main points. Drink Coffee Chocolate Milk or cream Size and glass Marocchino One espresso Cocoa powder (sometimes a little hot chocolate) A spoon of milk foam Small glass Caffè mocha Espresso Chocolate sauce or syrup Plenty of steamed milk Large cup or mug Bicerin (Turin) Espresso Thick hot chocolate Cold cream on top, not stirred Small stemmed glass Cappuccino One espresso None (cocoa on top is optional) Steamed milk and thick foam Cup In short: the mocha is a big, milky chocolate drink. The bicerin is richer and has three clear layers. The marocchino is the smallest and the most coffee-forward of the group. You can read the full story of the Turin drink in our guide to bicerin coffee. How to Make a Marocchino at Home: Step by Step You do not need a bar to enjoy a good marocchino. Here is a simple method. The amounts are a starting point, so change them to suit your taste. What you need Steps No espresso machine? A moka pot or an AeroPress works well. See our guide to espresso without a machine for three easy ways to brew a short, strong coffee. Common Mistakes to Avoid Where to Order a Marocchino in Italy The marocchino is easiest to find in Piedmont and the other regions of northern Italy. In Alessandria and Turin it is a normal bar order. In other cities many bars know it, but the recipe can change: some add hot chocolate, others use more foam. If you are not sure, ask the barista how they make it. For more drinks to try on your trip, see our list of Italian coffee drinks. Why it still matters The marocchino is proof that a great drink can be small and simple. It tells a local story of a hat town and its café. It also shows how Italians use cocoa, milk and espresso without hiding the coffee. Marocchino Coffee: FAQ Is a marocchino the same as a mocha? No. A mocha is a large drink with a lot of steamed milk and chocolate sauce. A marocchino is a small glass with one espresso, cocoa powder and only a little milk foam. Does a marocchino have sugar? The classic

Japanese Iced Coffee: The Essential 3-Minute Pour-Over Recipe
Japanese iced coffee is the cleanest way to make cold coffee with a pour-over. You brew hot coffee straight onto ice. The ice cools the cup at once and locks in the sweet, bright flavors. It takes about three minutes, not twelve hours. In Italy, iced coffee often means a shakerato, an espresso shaken with ice. Japanese iced coffee is the slow, gentle cousin. It suits light roasts, and it needs no machine. What Is Japanese Iced Coffee? It is a flash-brew method. You use half of your water as hot water. You replace the other half with ice in the server. The hot water pulls the flavor out of the coffee. The ice chills it fast, so aroma does not fade. Cold brew, in contrast, steeps for many hours. It tastes smooth and heavy. Japanese iced coffee tastes lighter, with more fruit and more acidity. If you want the slow style, read our cold brew guide. What You Need for Japanese Iced Coffee The Japanese Iced Coffee Recipe Roasters share many versions of this recipe. Most use a total ratio between 1:14 and 1:17, with about half of the water as ice. Here is a simple single-serve version based on those published guides. Tips to Get Better Japanese Iced Coffee Want the basic method first? Start with our V60 guide. You can also read about iced coffee on Wikipedia. Japanese Iced Coffee Ratio: Quick Cheat Sheet The recipe above uses a total ratio of 1:15 (20 g of coffee for 300 g of water, split into 200 g hot water and 100 g ice). Keep the same proportions and you can scale it up or down: Servings Coffee Hot water Ice 1 small glass 15 g 150 g 75 g 1 large glass 20 g 200 g 100 g 2 glasses 30 g 300 g 150 g 3–4 glasses 40 g 400 g 200 g Want it stronger? Move toward 1:14 by adding a little more coffee. Want it lighter? Use 1:16 or 1:17. Our coffee to water ratio guide explains how ratios change strength. Japanese Iced Coffee vs Cold Brew vs Kyoto Cold Drip People often mix up these three styles of cold coffee. They are very different in time and taste: Method How it works Time Typical taste Japanese iced coffee (flash brew) Hot pour-over brewed straight onto ice About 3 minutes Bright, clean, aromatic, more fruit Cold brew Grounds steep in cold or room-temperature water, then filtered Many hours (often 12 or more) Smooth, low acidity, heavier body Kyoto-style cold drip Ice water drips slowly through the coffee, drop by drop, in a tall tower Several hours Smooth and syrupy, with some brightness So which one should you choose? Pick Japanese iced coffee when you want a cold cup now and you love fruity beans. Pick cold brew when you want a batch for the week. And if you hear claims that cold brew has less caffeine or less acid, read our cold brew myths first. Common Mistakes (and Easy Fixes) Best Beans for Japanese Iced Coffee Flash brewing keeps aroma and acidity, so it rewards coffees with fruit and floral notes. Washed Ethiopian lots, such as Yirgacheffe, often taste like iced tea with lemon. A Kenya AA brings berry and blackcurrant notes. For a sweeter, rounder glass, try a washed Central American coffee. Any dripper works: if you do not own a V60, a Kalita Wave is a fine choice. How to Scale the Recipe for More Cups The recipe scales in a straight line. Keep the ratio the same and only change the size of the batch. Use this table as a guide. It assumes a total ratio of about 1:15, with one third of the liquid as ice. Cups Coffee Hot water Ice in server Brew time 1 (300 ml) 20 g 200 g 100 g 2:30–3:00 2 40 g 400 g 200 g 3:00–3:30 3 60 g 600 g 300 g 3:30–4:00 For two or three cups, use a bigger dripper or a Chemex. A small cone clogs and slows down. If the brew takes much longer than the times above, grind a little coarser. Fix the Taste: A Quick Troubleshooting Table Iced coffee hides mistakes less than people think. Cold mutes sweetness, so small errors show up fast. Taste your cup, then change one thing at a time. What you taste Likely cause What to change Sharp and sour Under-extracted Grind finer, or use hotter water Bitter and dry Over-extracted Grind coarser, or shorten the pour Weak and watery Too much ice, or too little coffee Use 5 g more coffee or 20 g less ice Flat and dull Stale beans or a late brew Use fresher coffee and brew it right away Cloudy and muddy Fines in the bed Rinse the filter and pour more gently Which Dripper Works Best? Any pour-over cone can make Japanese iced coffee. The method does not depend on one brand. V60 or similar cone: Gives the brightest cup. It is easy to control, but it needs a steady pour. Flat-bottom drippers: More forgiving. They give a rounder, sweeter cup. Chemex: Very clean and good for batches of two or three cups. Use the thick filter and rinse it well. AeroPress: A fast option for one cup. Use a fine grind and press over a glass of ice. If you are choosing your first dripper, read our guide to the Hario V60 before you buy. How to Serve and Store It Serve the coffee over fresh ice if you like. The ice from the brew melts as the coffee cools, so it can taste thin if it sits in the glass for a long time. A few new cubes keep the drink cold without extra dilution. Drink it soon. Aroma fades quickly in iced coffee, and the sweet, fruity notes are the first to go. If you must keep some, put it in a sealed bottle in the fridge and finish it within a
Best Gooseneck Kettles for Pour-Over: 4 Essential Picks
Want the best gooseneck kettles for pour-over coffee? You have come to the right place. A gooseneck kettle has a long, thin, curved spout. It lets you pour slowly and put the water right where you want it. That control is the main reason pour-over fans buy one. Pour-over is big in Italy’s new wave of specialty coffee shops. Most home Italians still use the moka, a small stovetop pot. But if you brew with a V60 or a Kalita, the kettle matters as much as the grinder. Why a Gooseneck Kettle Matters A normal kettle pours fast and wide. That floods the coffee bed and gives uneven extraction. A gooseneck slows the stream. You can pour in small circles and keep the flow steady. It also helps with timing. Pour-over recipes ask for water in stages. A thin spout makes those stages easy to repeat. If you want a recipe to start with, see our Kalita Wave guide. What to Look for in the Best Gooseneck Kettles Before the picks, here are the features that matter most. Prices and specs come from maker pages and published reviews, so check the current listing before you buy. Our Picks: The Best Gooseneck Kettles Compared We have not tested these kettles ourselves. This list is based on published specs, expert reviews, and what owners report. Best overall: Fellow Stagg EKG The Fellow Stagg EKG is the kettle most reviewers rank first. It is electric, holds about 0.9 liters, and lets you set the temperature in small steps. One owner test reported that it holds heat within about 1°F. It also has a hold mode of up to 60 minutes. The downside is price, at about $180. Some reviewers also find the flow slow for French press or AeroPress. Fellow now sells Pro versions with extra features, so compare them first. Best stovetop: Hario V60 Buono The Hario Buono is a classic. It has no electronics, so there is nothing to break. It comes in 0.7, 1.0, and 1.2 liter sizes, and costs about $60. You need a thermometer to check the heat. If you like simple tools, it is a fine choice. You can browse the Hario Buono on Amazon. Best electric alternative: Brewista Artisan The Brewista Artisan holds 1 liter and offers a range of about 104°F to 212°F, with a 60-minute hold. It costs about $160 to $170. Reviewers say it heats a little slower and is a bit louder than the Stagg. They also say the flow is stronger, which some people prefer. Best for small budgets and small cups: Timemore Fish Smart The Timemore Fish Smart is a compact electric kettle with 600 ml capacity. Guides often name it a value pick for one or two cups. It also has variable temperature control. A small size means more refills if you brew for a crowd. You can see the Timemore Fish Smart on Amazon. Gooseneck Kettles Compared: Quick Table Here are the four picks side by side. Prices are approximate and change often, so check the current price before you buy. Kettle Type Capacity Temperature control Approx. price Fellow Stagg EKG Electric About 0.9 L Yes, in small steps, with hold mode About $180 Hario V60 Buono Stovetop 0.7, 1.0 or 1.2 L No, use a thermometer About $60 Brewista Artisan Electric 1 L Yes, about 104F to 212F, with hold mode About $160 to $170 Timemore Fish Smart Electric 600 ml Yes Budget pick Which One Should You Buy? Whatever you pick, pair it with a good scale. Our guide to the best coffee scales can help. For background on the tool itself, see the kettle entry on Wikipedia. Electric or Stovetop: Which Gooseneck Kettle Is Better? An electric kettle with temperature control is the easy choice. You pick a number, and the kettle holds it. That makes your brews easier to repeat. A stovetop kettle is cheaper and has no parts that can fail. It works on gas and on most other hobs. The trade-off is that you need a thermometer, and the water cools while you pour. If you brew every day and like precise recipes, go electric. If you brew now and then, or you want a simple tool that lasts, a stovetop model is enough. How to Pour With a Gooseneck Kettle Gooseneck Kettle FAQ Do you really need a gooseneck kettle for pour-over? No, but it helps a lot. A normal kettle pours too fast and in a wide stream. A gooseneck gives you a slow, thin flow, so the coffee extracts more evenly. What water temperature is best for pour-over? Most guides suggest about 90 to 96C (195 to 205F). Use the hotter end for light roasts and the cooler end for dark roasts. Is a gooseneck kettle good for French press or AeroPress? It works, but you do not need it. These methods soak the coffee, so pour control matters less. Some reviewers find the flow of slim spouts slow for filling a big French press. Can I use a gooseneck kettle for tea? Yes. A model with temperature control is handy for green and white teas, which need cooler water than black tea. How do I clean or descale a gooseneck kettle? Follow the maker’s instructions. A common method is to fill it with a mix of water and citric acid or white vinegar, heat it, let it sit, then rinse well. Do it more often if you have hard water. Final Thoughts A gooseneck kettle will not fix a stale bean or a poor grind. But it gives you control over the pour, and that makes every brew easier to repeat. Start with the one that fits your budget and your cup size. At IndieRoastersItaly, we are building a way to enjoy fresh coffee from independent Italian roasters, roasted to order. Visit our homepage to join the waitlist. This article was written with the support of artificial intelligence for content structuring, and was fully reviewed, verified, and