
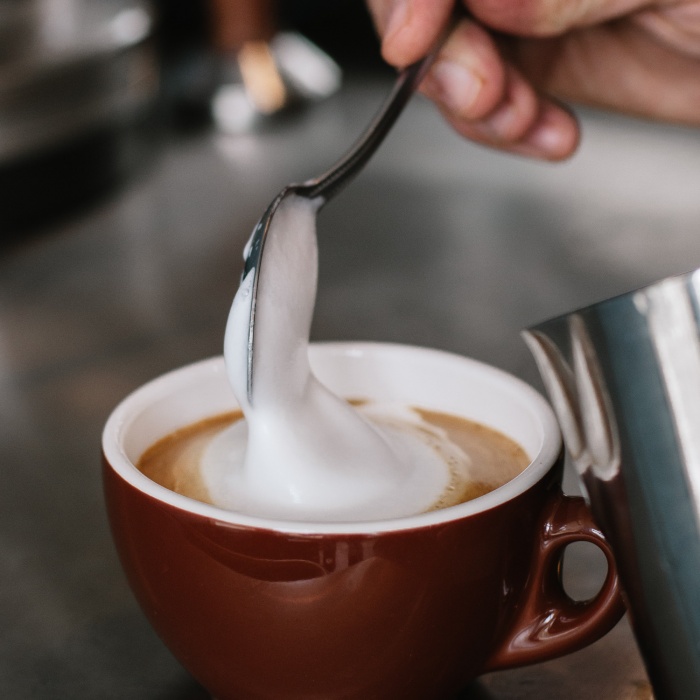
Walk into any bar in Italy at 8 a.m. and you will hear the same sound: the hiss of a steam wand and the soft tap of a milk jug on the counter. A good cappuccino is all about that milk. The good news? You don’t need a pro machine to get close. This guide shows you how to froth milk at home with tools you may already own. We will cover the right milk, the right heat and five simple methods. Some give silky foam, some give fluffy foam. All of them beat a cup of plain warm milk. What Frothing Really Does Frothing is just air plus heat. You push tiny bubbles into warm milk, and the milk proteins wrap around them. That is what holds the foam up. Fat adds body and a creamy taste, but too much air makes big, dry bubbles. Baristas aim for “microfoam”. These are bubbles so small you can’t see them, which make the milk look glossy, like wet paint. A steam wand does this best, because it heats and adds air at once. Home methods can’t fully match it. Still, with a little care, they get very close. The Best Milk for Frothing Always start with cold milk straight from the fridge. Cold milk gives you more time to add air before it gets too hot. The Right Temperature Aim for about 55 to 65°C (130 to 150°F). At that point the milk tastes sweet and feels hot, but not scalding. Go much higher and the milk loses its sweet taste, and the foam starts to break down. If you have no thermometer, use your hand: the jug should feel too hot to hold for more than a second or two. Never let the milk boil. How to Froth Milk: 5 Easy Methods 1. Handheld Milk Frother This small battery wand is the cheapest tool made for the job. Heat the milk first in a pan or the microwave. Then dip the whisk just below the surface and switch it on. Keep the tip near the top for about 15 seconds to add air. Then push it lower to swirl and smooth the foam. A popular pick is the Zulay milk frother wand, which has many thousands of owner reviews. 2. French Press If you own a French press, you own a frother. Pour warm milk into the press, filling it no more than a third. Put the lid on and pump the plunger up and down fast, about 15 to 20 times. Start with long strokes, then use shorter ones to tighten the foam. It takes under a minute, and the mesh breaks up the big bubbles. Our French press guide covers the coffee side too. 3. Manual Pump Frother This is the Italian take on the French press trick. A manual frother is a jug with a fine mesh plunger, made only for milk. Some, like the Bialetti Tutto Crema milk frother, can go on the stove to heat the milk too. Pump for 20 to 30 seconds and you get thick, creamy foam. It pairs well with a moka pot for a home cappuccino. 4. The Jar Method No tools at all? Grab a clean jar with a lid. Fill it halfway with cold milk, close it tight and shake hard for 30 to 60 seconds. Then take off the lid and heat the jar in the microwave for about 30 seconds. The heat sets the foam so it holds its shape. The result is light and fluffy rather than silky, but it works in a pinch. 5. Whisk in a Pan Heat the milk gently in a small pan. Tilt the pan a little and whisk fast, back and forth, for about a minute. A balloon whisk works best. This takes more effort, and the foam is coarser. Still, it is a good backup when nothing else is around. Tips for Smoother, Silkier Foam Cappuccino, Latte or Flat White? Once you know how to froth milk, you can make most café drinks at home. The main difference is how much foam you use. A cappuccino has a thick cap of foam on top of espresso and milk. A latte has more milk and only a thin layer of foam. A flat white uses even less foam and a stronger coffee taste. In Italy, the cappuccino is mostly a morning drink, often with a pastry. If you are curious why, read our history of the cappuccino. For the coffee base, a strong moka pot brew works well when you have no espresso machine. Common Mistakes to Avoid Choosing the Right Milk Whole milk gives the creamiest foam, thanks to its fat and protein. Semi-skimmed milk makes lighter, stiffer foam. Plant milks vary a lot. Barista editions of oat or soy milk are made to foam well and resist splitting in hot coffee. Always start with cold milk from the fridge. Cold milk gives you more time to build texture before it gets too hot. Use a cold jug, too, if you can. Troubleshooting Your Foam Frequently Asked Questions Can I froth milk without a machine? Yes. A hand whisk, a French press or a small battery frother all work. Warm the milk first for the best result. What is microfoam? It is milk with very tiny bubbles, glossy and smooth. It pours well and is used for latte art. Final Thoughts Learning how to froth milk at home takes a few tries, not a pricey machine. Start with cold whole milk or a barista oat milk, heat it gently and pick the method that fits your kitchen. In a week, your morning cappuccino will feel a lot more like Italy. Of course, great milk deserves great coffee. That’s the idea behind IndieRoastersItaly: a curated selection of small Italian roasters, with beans roasted to order and sent fresh to your door. Visit our home page and join the waitlist to be among the first to try it. This
Timemore C3 Review: An Honest Look at a Budget Hand Grinder
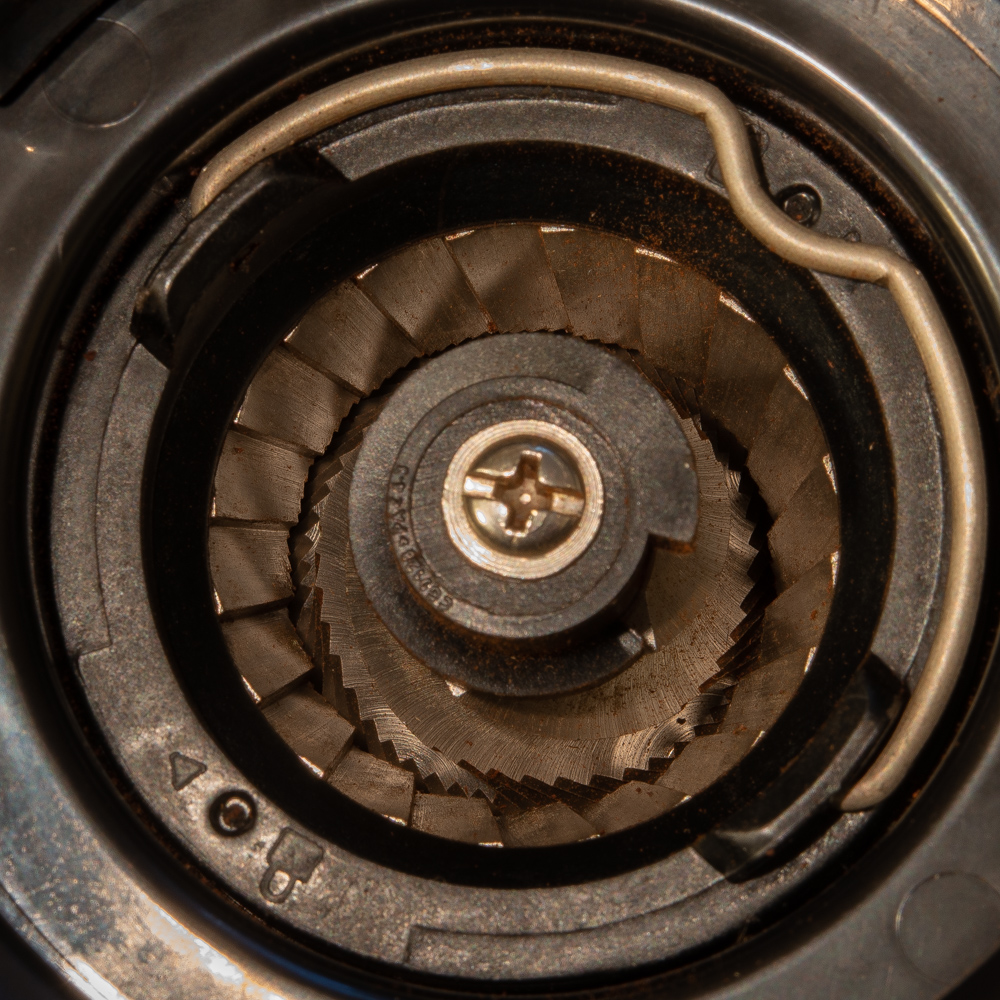
Every coffee guide says the same thing: the grinder matters more than the brewer. But a good grinder can cost more than a week of groceries. That is why so many people end up looking at the Timemore Chestnut C3. In this Timemore C3 review, we look at what the specs say, what owners report, and who this small hand grinder is really for. One note first. We have not tested the C3 ourselves. This review is based on published specs, expert reviews and the long user threads you find in coffee forums. Where sources disagree, we say so. What Is the Timemore C3? The C3 is a manual grinder made by Timemore, a brand from China known for good gear at fair prices. It is the follow-up to the Chestnut C2, which was a cult favorite for years. From the outside the two look almost the same: a slim, ribbed aluminum body, a crank on top and a small catch cup below. The big change is inside. The C3 uses new burrs, a new bearing system and a few plastic parts to cut weight. It sits in the budget tier, well below premium grinders like the Comandante C40 or the 1Zpresso range. Timemore C3 Review: Key Specs at a Glance A 20 g dose is enough for one big mug or two small cups. If you often brew for three or four people, you will be grinding twice. The larger C3 Max models exist for that reason. The S2C Burrs: Hype or Real Gain? Timemore makes a lot of noise about its S2C burrs. The idea is simple. Small teeth on the outer edge “spike” the bean first, then the lower part cuts it into even pieces. Even pieces matter because they extract at the same speed. Uneven pieces give you a cup that is bitter and sour at once. If you want the basics, here is how a burr mill works. So do the burrs deliver? Most reviewers agree on a middle answer. Home Coffee Expert rated grind consistency 8 out of 10 and found it great at coarser settings. They also called it only a small step up from the C2, not the leap the marketing suggests. Many owners say the same: cleaner, sweeter pour overs, but no magic. Read next: Best Manual Coffee Grinder: 5 Hand Grinders Worth Buying · Coffee Grind Size: 6 Secrets to Getting It Just Right · Best Pour Over Dripper: V60, Kalita Wave or Chemex? How Fast and Easy Is It to Use? The C3 is light and slim, so it fits well in smaller hands. Owners often praise the smooth crank, thanks to the dual bearings that keep the burr steady. It is not the fastest grinder around, though. At filter settings, one review puts it at about half a gram per second. That means close to a minute for a typical 15 to 20 g dose. Some reviewers found it a bit slower than the C2 at medium and coarse sizes. For a morning cup, that is a small price. For a crowd, it adds up. Grind Settings: How to Dial It In Here is the quirk most new owners notice. The dial has no numbers. You close the burrs to zero, then count clicks back out. It sounds fussy, but with only about 36 clicks in total it is quick to learn. Not all those clicks are useful. The first few are too fine for almost anything, and the last ones are very coarse. Most reviews land on about 20 settings that you will really use. As a rough starting point, based on published click guides: Treat these as a first guess, not a rule. Every bean and roast is a bit different, and so is every unit. Taste, then adjust one or two clicks at a time. Our coffee grind size guide explains what each size should look and taste like. Can the Timemore C3 Grind for Espresso? Timemore says yes. Reviewers say “barely”. The steps between clicks are too large to fine-tune a shot. Home Coffee Expert found only one click that gave a decent espresso, and only with dark roast beans. One click finer choked their machine. One click coarser ran watery. If espresso is your main drink, look at the Timemore Chestnut C3 ESP instead. It uses the same burr size but a much finer dial, with about 30 clicks per turn. That makes small changes possible, which is what espresso needs. Build Quality and the Plastic Question To keep the weight down, Timemore used a thin aluminum body and some plastic parts inside the original C3. Owners rarely report problems, since the parts under real stress are steel. Still, a thin body can dent if you drop it. If that bothers you, the C3S is the upgrade most people point to. It keeps the same burrs but swaps the plastic parts for metal. You can find the Timemore Chestnut C3S hand grinder on Amazon, and owners there rate it well. The price gap is usually small. C3, C3S, C3 ESP or C3 Pro: Which One? Cleaning and Care Keep water away from the burrs. Use the small brush that comes in the box instead. A quick brush of the catch cup after each use helps a lot. About once a week, take the burr out and brush away old grounds and oils. It takes around ten minutes and keeps the coffee tasting fresh. Pros and Cons of the Timemore C3 What Owners Like What Owners Don’t Like Final Verdict of This Timemore C3 Review The Timemore C3 is a smart first grinder for anyone who brews filter coffee at home. It turns whole beans into a fairly even grind, it is light, and it costs far less than the premium names. Just don’t buy it for espresso, and be ready to count clicks. If you brew with a V60, an AeroPress or a French press, it is a big step up from
Brazilian Coffee: 7 Essential Facts About the World’s Biggest Origin
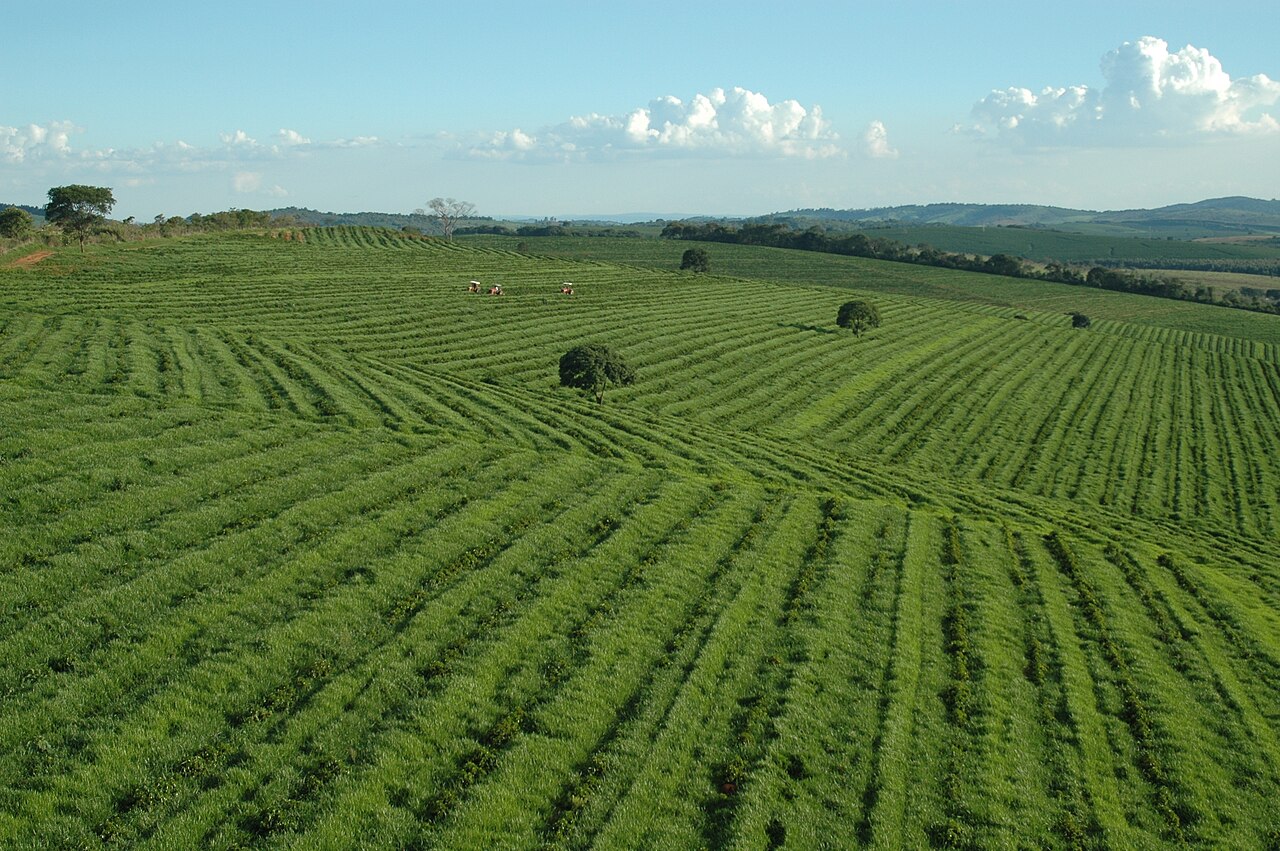
If you have ever had an espresso in Italy, there is a good chance you have tasted Brazilian coffee. Brazil is the largest coffee producer on Earth, and it has held that title for well over a century. Its beans are the quiet base of countless blends, from Milan to Melbourne. Yet Brazil is often seen as the “safe” origin, the one that is good but never thrilling. That picture is out of date. Today the country makes both huge volumes of everyday coffee and some truly special lots. Here is what makes this origin so important, and what to expect in the cup. Brazilian Coffee in Numbers Brazil grows roughly a third of the world’s coffee in a typical year. Most of it is Arabica, but the country is also a major grower of Robusta, which locals call conilon. Coffee covers vast areas of farmland, from small family plots to estates the size of a town. The story began in the 18th century. A popular legend says a Portuguese officer, Francisco de Melo Palheta, brought the first coffee seeds in from French Guiana in 1727. By the 1800s, coffee had become the engine of the Brazilian economy. You can read more about this past on the Wikipedia page on coffee production in Brazil. The Main Growing Regions Brazil is huge, so “Brazilian coffee” covers many places. Most of the good Arabica comes from the state of Minas Gerais, which grows about half of the country’s crop. Three regions stand out. Cerrado Mineiro The Cerrado is a high, flat savanna with a clear wet and dry season. Farms sit at about 800 to 1,200 meters. The flat land allows machine harvesting, and the dry winters are ideal for drying coffee in the sun. In 2013 it became the first Brazilian coffee region with a Designation of Origin. Sul de Minas South Minas is the historic heart of Brazilian coffee. Farms climb the Mantiqueira hills, often between 850 and 1,350 meters. The cooler air and hilly land give coffees with more sweetness and, at times, a touch of fruit. Mogiana Mogiana sits on the border between São Paulo and Minas Gerais. It is one of the oldest coffee zones in the country. Its coffees are known for a round body and notes of chocolate and caramel. How Brazilian Coffee Is Grown and Harvested In much of the world, coffee cherries are picked by hand, one ripe fruit at a time. In Brazil, many farms use machines or strip whole branches at once. This keeps costs low but mixes ripe and unripe fruit. Careful farms then sort the cherries to keep only the best. The harvest runs in the dry season, roughly from May to September. This long dry spell is the secret behind Brazil’s love of the natural process. Natural and Pulped Natural: Brazil’s Signature Processes With natural processing, the whole cherry dries in the sun with the bean still inside. The fruit sugars soak into the seed. The result is a sweet, heavy cup with low acidity. Brazil’s dry winters make this simple method work on a vast scale. Brazil also made the pulped natural process famous. Here the skin is removed, but some sticky fruit is left on the bean while it dries. It sits between a washed and a natural coffee, with a clean cup and lots of sweetness. It is close to what Central America calls the honey process. Our guide to coffee processing methods explains each one in detail. What Does Brazilian Coffee Taste Like? A classic Brazilian coffee is easy to love. Expect: The best lots from high farms can go further. They may show red fruit, citrus or even floral notes. Varieties play a part here. Brazil grows Bourbon, Mundo Novo, Catuaí and many newer hybrids. Yellow Bourbon in particular is prized for its sweetness. For more on these plants, see our guide to Arabica coffee varieties. Why Italian Espresso Loves Brazilian Coffee Walk into a bar in Italy and order un caffè, which simply means an espresso. The blend in the grinder very often has a Brazilian natural at its core. Roasters use it as a base because it brings body, sweetness and a thick, steady crema. It also keeps the acidity low, which suits the classic Italian taste. Other origins are then added on top, like spices in a recipe. An Ethiopian coffee might add flowers, or a Central American one some bright fruit. This blending habit is a big part of the history of espresso in Italy. How to Brew Brazilian Coffee at Home Brazilian coffee is forgiving, so it works with almost any method. A few tips: Brazilian Coffee in Espresso Many Italian espresso blends use Brazilian coffee as a base. It adds body, a thick crema and a sweet, nutty taste. It also helps to soften the acidity of brighter beans. For many roasters, it is the backbone of a balanced blend. Single-origin Brazilian espresso is popular too. Look for notes of chocolate, hazelnut and caramel. Milk drinks taste especially good with it. Sustainability and Farming Brazil’s farms vary from small family plots to huge estates. Many use machines to harvest, because the land is flat. Others pick by hand on steep slopes. Ask your roaster how the coffee was grown and who grew it. Transparent roasters will happily share this. How to Choose a Brazilian Coffee Frequently Asked Questions Is Brazilian coffee low in acidity? Often, yes. That is why it feels smooth and soft in the cup. Is it a good everyday coffee? Yes. Its sweet, easy taste suits daily drinking in many brew methods. Roast and Grind Tips For espresso, a medium roast with a fine grind usually works best. For a French press, go coarser. Always weigh your dose, and adjust in small steps until the cup tastes sweet and balanced. Final Thoughts Brazilian coffee is far more than a cheap base for blends. It is the backbone of Italian espresso and the source
Coffee Brewing Myths: 7 Surprising Truths for a Better Cup
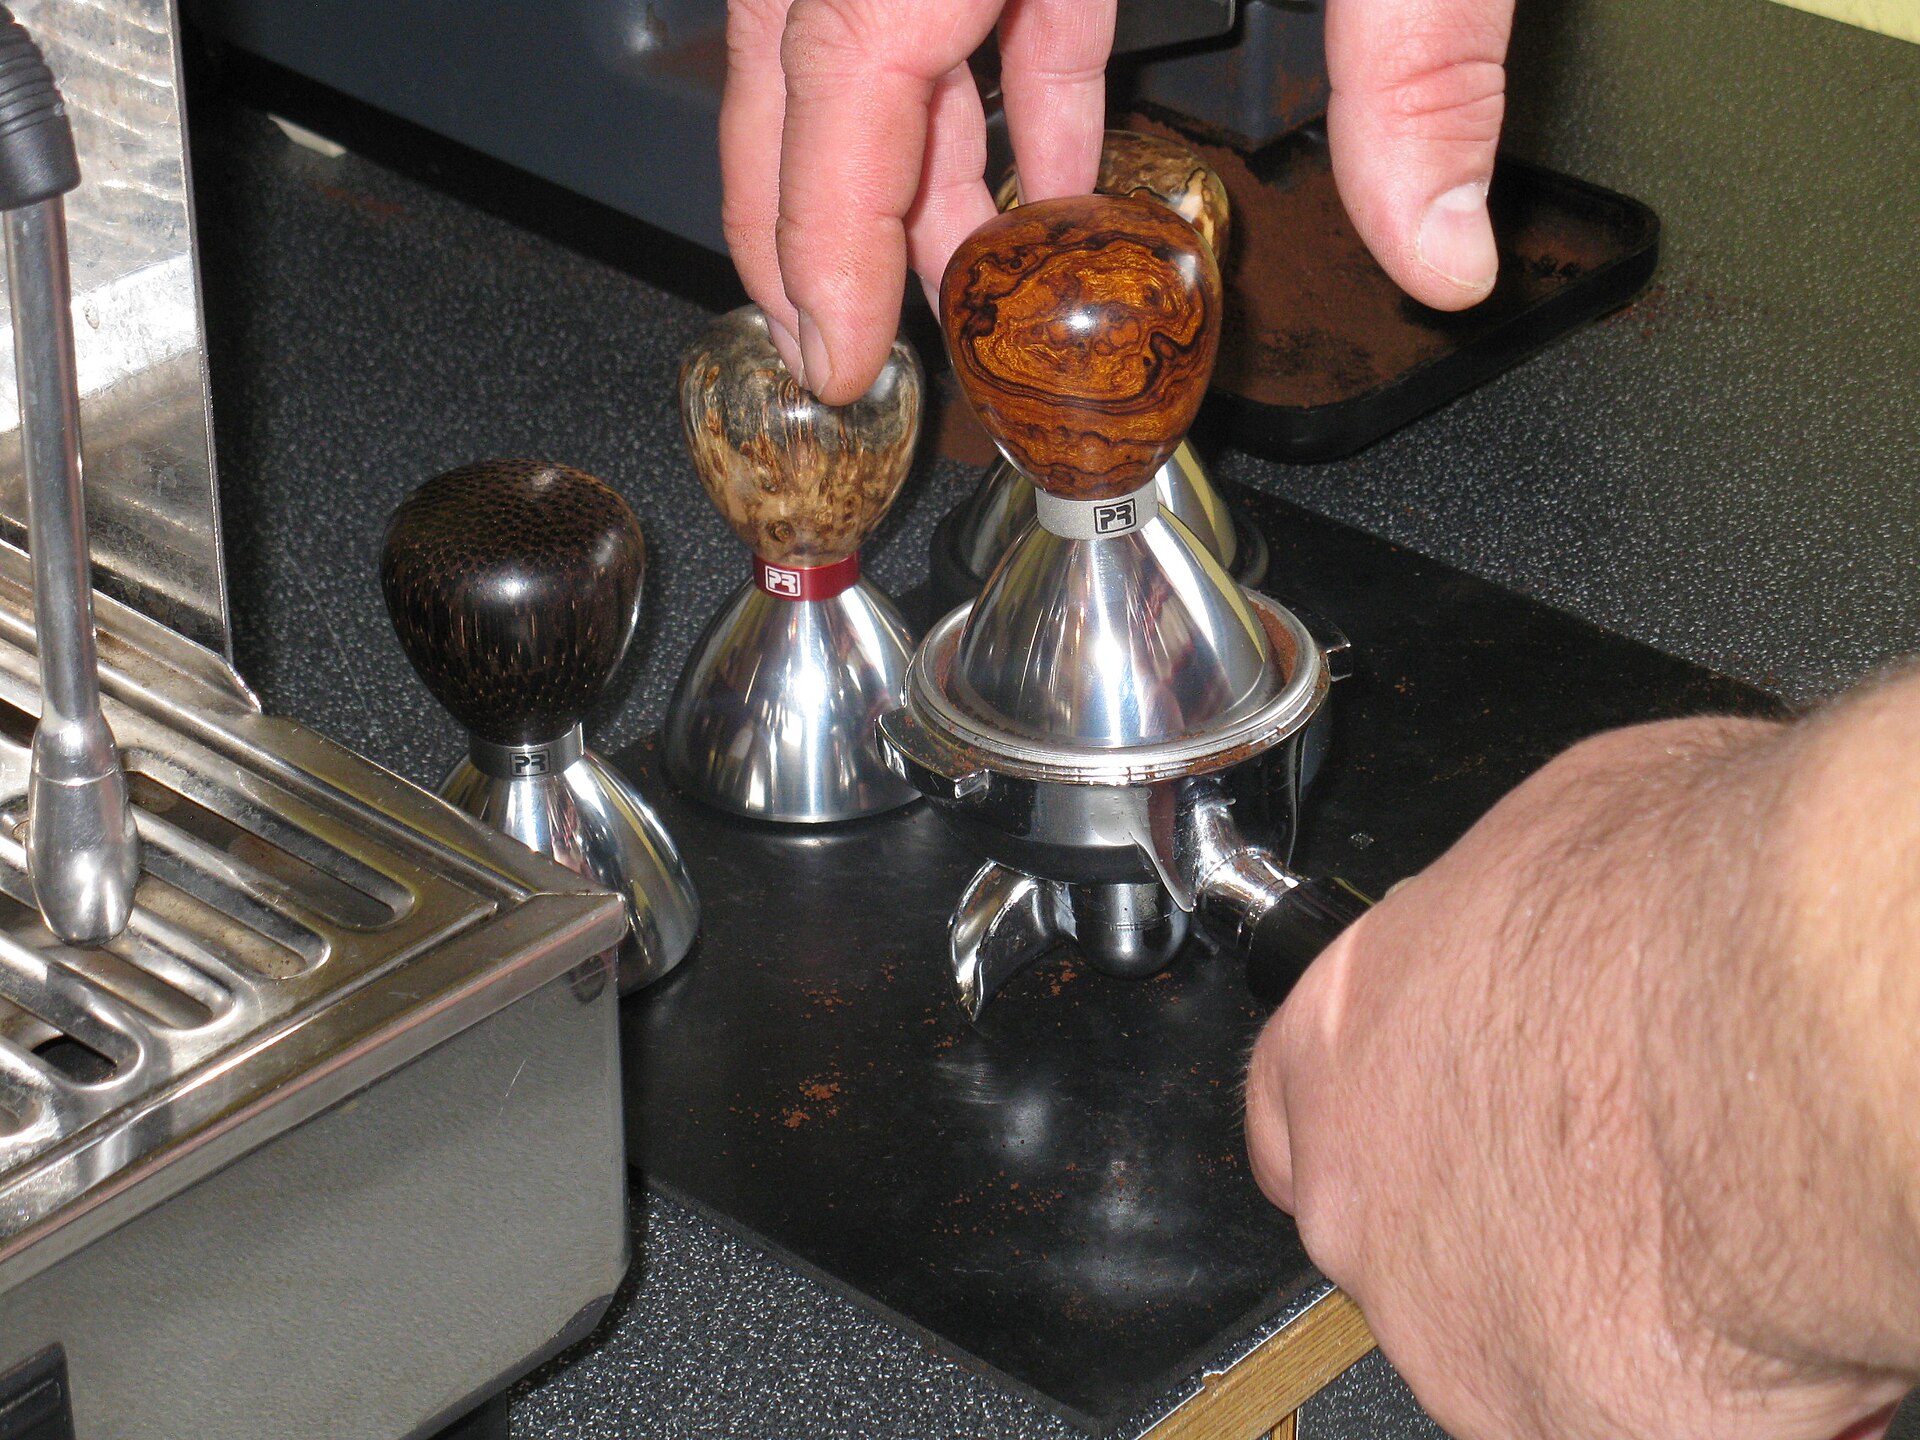
Coffee at home is full of rules. Some come from a grandparent, some from a forum, and some from a barista who said it once with great confidence. A few of them are right. Many are half right. And some are plain wrong. In this guide we look at seven common coffee brewing myths, what the science says, and what to do instead. You don’t need a lab or a pricey setup to brew well. You just need to know which habits help and which ones quietly hold your cup back. Let’s start with the one that sparks the most debate. Myth 1: Boiling Water Burns Your Coffee This is one of the most repeated coffee brewing myths. The idea is that water at a full boil “scorches” the grounds. But coffee beans are roasted at well over 200°C (about 400°F). Water at 100°C (212°F) can’t burn them in any real sense. What water heat does change is extraction. Hotter water pulls flavor out faster. The Specialty Coffee Association suggests a range of about 90–96°C (195–205°F) for most brewing. Water right off the boil is at the top of that range, or just above it. For a dark roast, that can tip the cup toward bitter. For a light roast, near-boiling water often works very well, since dense, lightly roasted beans are harder to extract. The simple fix: boil the water, then wait about 30 seconds before you pour. If you brew a lot of pour-over, a kettle with a set heat, like this Cosori gooseneck electric kettle, takes the guessing out of it. Myth 2: More Coffee Always Makes a Better, Stronger Cup Adding an extra scoop feels like a safe bet. In truth, it often makes things worse. Strength and flavor are two different things. Strength is how much coffee ends up in the water. Flavor depends on extraction, which is how well the water pulls out the good parts of the grounds. Too much coffee for the water can leave the cup under-extracted. It tastes heavy but also sour and thin at the finish. A steady ratio is the real key. For filter coffee, around 1 gram of coffee to 16 grams of water is a great start. Our guide to the coffee to water ratio explains how to tune it for each method. Myth 3: The Bloom Is Just for Show The bloom is the short pause at the start of a pour-over. You wet the grounds with a little water and wait 30 to 45 seconds. Some people skip it as barista theater. It isn’t. Freshly roasted coffee holds a lot of carbon dioxide. When hot water hits it, that gas rushes out and the bed bubbles up. If you pour all the water at once, the gas pushes water away from the grounds. The result is uneven extraction. A short bloom lets the gas escape first, so the rest of the brew flows evenly. A big, lively bloom is also a good sign of fresh beans. Coffee that barely bubbles has likely been sitting on a shelf for months. Myth 4: You Must Tamp Espresso With 30 Pounds of Force Many home baristas learn that a “perfect” tamp needs exactly 30 pounds of pressure. It’s a handy rule of thumb, but the number itself isn’t magic. Once the coffee bed is fully packed, pressing harder does very little. The espresso machine pushes water at around 9 bars, far more than any arm can add. What really matters is a level, even tamp, done the same way every time. A tilted puck lets water rush through the thin side. This is called channeling, and it gives a sour and bitter shot at once. Press until the coffee stops giving, keep the tamper flat, and stay consistent. Some people like a calibrated espresso tamper for this, since it clicks at the same pressure each time. Myth 5: A Finer Grind Always Means More Flavor Grinding finer does speed up extraction. So it’s easy to think finer is always better. But every brew method has a sweet spot. Go too fine in a pour-over and the water drains slowly, the bed clogs, and the cup turns bitter and dry. Go too fine in a French press and the mesh lets sludge through. The goal is the right grind for the method, not the finest one. A good burr grinder helps more than any other tool, since it makes even particles. For a full chart by method, see our coffee grind size guide. Myth 6: Rinsing Paper Filters Is a Waste of Time Paper filters can give a faint papery taste, mainly in light, delicate coffees. A quick rinse with hot water washes most of it away. It also warms the dripper and the cup, so your brew doesn’t lose heat in the first minute. It takes ten seconds and uses a splash of water. Just remember to throw away the rinse water before you start brewing. If you use a cone dripper, our V60 coffee guide walks through the full routine step by step. Myth 7: Water Doesn’t Matter, Only the Beans Do A cup of filter coffee is about 98% water. So water quality shapes the taste more than most people think. Very hard water can mute bright notes and leave scale in your gear. Distilled water, with no minerals at all, tends to give a flat and hollow cup. Minerals like calcium and magnesium help pull flavor from the grounds. You don’t need fancy bottled water. If your tap water tastes good, it is often fine. If it tastes of chlorine or leaves heavy scale, a simple filter jug is an easy upgrade. The SCA coffee standards include target values for brewing water if you want to go deeper. How to Avoid Common Coffee Brewing Myths at Home Here is a short checklist to keep these myths out of your kitchen: How to Tell Fact From Folklore Ask where a claim comes from. If
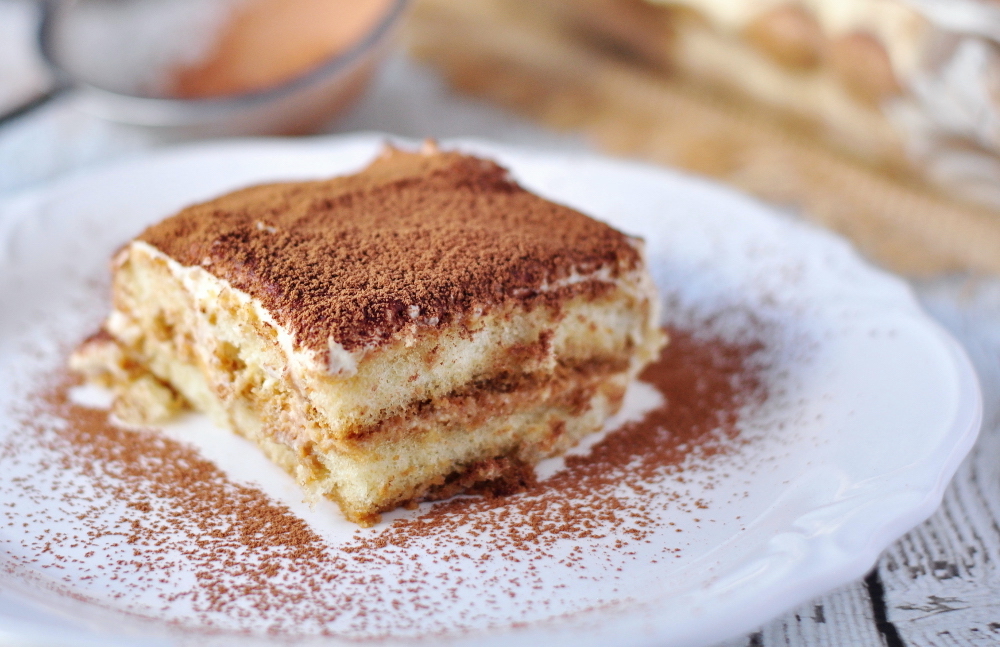
The History of Tiramisu: How Coffee Became Italy’s Favourite Dessert
Quick answer: Tiramisu comes from north-east Italy. Two regions claim it, the Veneto and Friuli Venezia Giulia. It is a modern dessert from the 1960s and 1970s, not an old family recipe. Tiramisu may be the most famous coffee dessert on earth. You can find it in a Tokyo café, a New York diner and a tiny trattoria in the Alps. Yet it is younger than you might think, and its birthplace is still a matter of hot debate in Italy. The history of tiramisu is a story of family kitchens, rival regions and, above all, good coffee. In this article we follow that story from its first traces to its world fame. We also look at the part coffee plays, and why the cup you soak your biscuits in matters more than any other step. Where Is Tiramisu From? Treviso vs Friuli Tiramisu comes from north-east Italy. Two regions claim it. Veneto points to Treviso, where the restaurant Le Beccherie served a layered dessert of savoiardi, espresso and mascarpone cream from the late 1960s and early 1970s. Friuli Venezia Giulia points to Tolmezzo, in the Carnia mountains, where a similar spoon dessert is said to have been served in the 1950s. In 2017 Italy’s agriculture ministry added tiramisu to Friuli Venezia Giulia’s list of traditional food products, which reopened the debate. Most food historians still link the modern recipe and its name to Treviso. Either way, the short answer is the same: tiramisu is from north-east Italy, between Veneto and Friuli. What Is Tiramisu? Tiramisu is a layered dessert served cold. Its base is savoiardi, the light, dry biscuits known in English as ladyfingers. They are dipped in coffee, then layered with a soft cream of egg yolks, sugar and mascarpone, a rich fresh cheese from Lombardy. A dusting of bitter cocoa goes on top. Is tiramisu a coffee dessert? Yes. Coffee is one of its key ingredients: the ladyfingers are soaked in strong coffee, usually espresso. That is what gives tiramisu its bitter, roasted flavor and its soft texture. The name comes from the Italian phrase “tirami su”, which means “pick me up” or “cheer me up”. It is easy to see why. Coffee, sugar and cocoa make a sweet little lift at the end of a meal. The History of Tiramisu: A Young Classic Where is tiramisu from? Short answer: north-east Italy. Two regions claim it: the Veneto, where the restaurant Le Beccherie in Treviso served it from the early 1970s, and Friuli Venezia Giulia. Either way, the tiramisu we know today is a fairly modern dessert, born in the 1960s and 1970s. Many people imagine tiramisu as an old recipe passed down from grandmother to grandchild. The records say otherwise. The dessert does not appear in Italian cookbooks before the 1960s. It is missing from Italian dictionaries of the 1970s and first shows up in one in 1980. English dictionaries followed in the early 1980s. That makes tiramisu a child of the boom years after the Second World War. Italy was growing richer. Espresso bars had spread across the country, and coffee had become part of daily life. A dessert built on coffee fit that new world perfectly. Treviso and Le Beccherie The best known claim comes from Treviso, a quiet city in the Veneto region, near Venice. Here stood Le Beccherie, a restaurant run by Ado Campeol and his wife Alba Di Pillo. According to the family, Alba and the pastry chef Roberto Linguanotto created the dessert in the late 1960s, often dated to Christmas Eve of 1969. It joined the menu in 1972. The first version was round, with no alcohol. It used only savoiardi, eggs, sugar, mascarpone, coffee and cocoa. When Ado Campeol died in 2021, news outlets across the world called him “the father of tiramisu”. Read next: Italian Coffee Drinks: 10 Essential Orders and the Unwritten Rules · The History of Cappuccino: 6 Milestones from Vienna to Milan · Affogato: 5 Surprising Facts About Italy’s Drowned Coffee Dessert The Friuli Claim Not everyone agrees. The nearby region of Friuli-Venezia Giulia has its own story. In the mountain town of Tolmezzo, a cook named Norma Pielli is said to have served a tiramisu cake to hikers in the 1950s. There are also reports of a frozen dessert called “tiremesù” in the town of Pieris as early as 1938. In 2017, Italy’s Ministry of Agriculture added tiramisu to its list of traditional food products for Friuli-Venezia Giulia. Veneto was not pleased. Its leaders had already tried to win special protection for the dessert, and the quarrel between the two regions made headlines. Today both sides still claim it, and the truth may never be fully settled. Older Roots and Fun Legends Some food writers see tiramisu as the child of older sweets. One is sbatudin, a simple mix of egg yolk and sugar that Venetian families gave to children and tired adults as a pick-me-up. Another is zuppa inglese, a layered dessert of sponge and custard. There are wilder tales too, like a story that places its birth in 17th-century Siena. These make good stories, but there is no firm proof behind them. Why Coffee Is the Heart of Tiramisu Take away the coffee and tiramisu falls flat. The coffee gives the dessert its bitter edge, which cuts through the sweet, fatty cream. It also gives the biscuits their soft, almost custard-like bite. In Italy the coffee is usually espresso from a bar machine, or coffee from a moka pot at home. The moka is the small stovetop brewer found in almost every Italian kitchen, such as the classic Bialetti Moka Express. Both give a strong, dense brew. That strength matters, because the cream and sugar soften the flavour a lot. Tips for the Coffee in Your Tiramisu How Tiramisu Conquered the World From the 1980s, tiramisu travelled fast. Italian restaurants abroad put it on their menus, and food magazines printed endless versions. By the 1990s it was one of the best
Coffee to Water Ratio: The Simple Guide for Every Brew Method
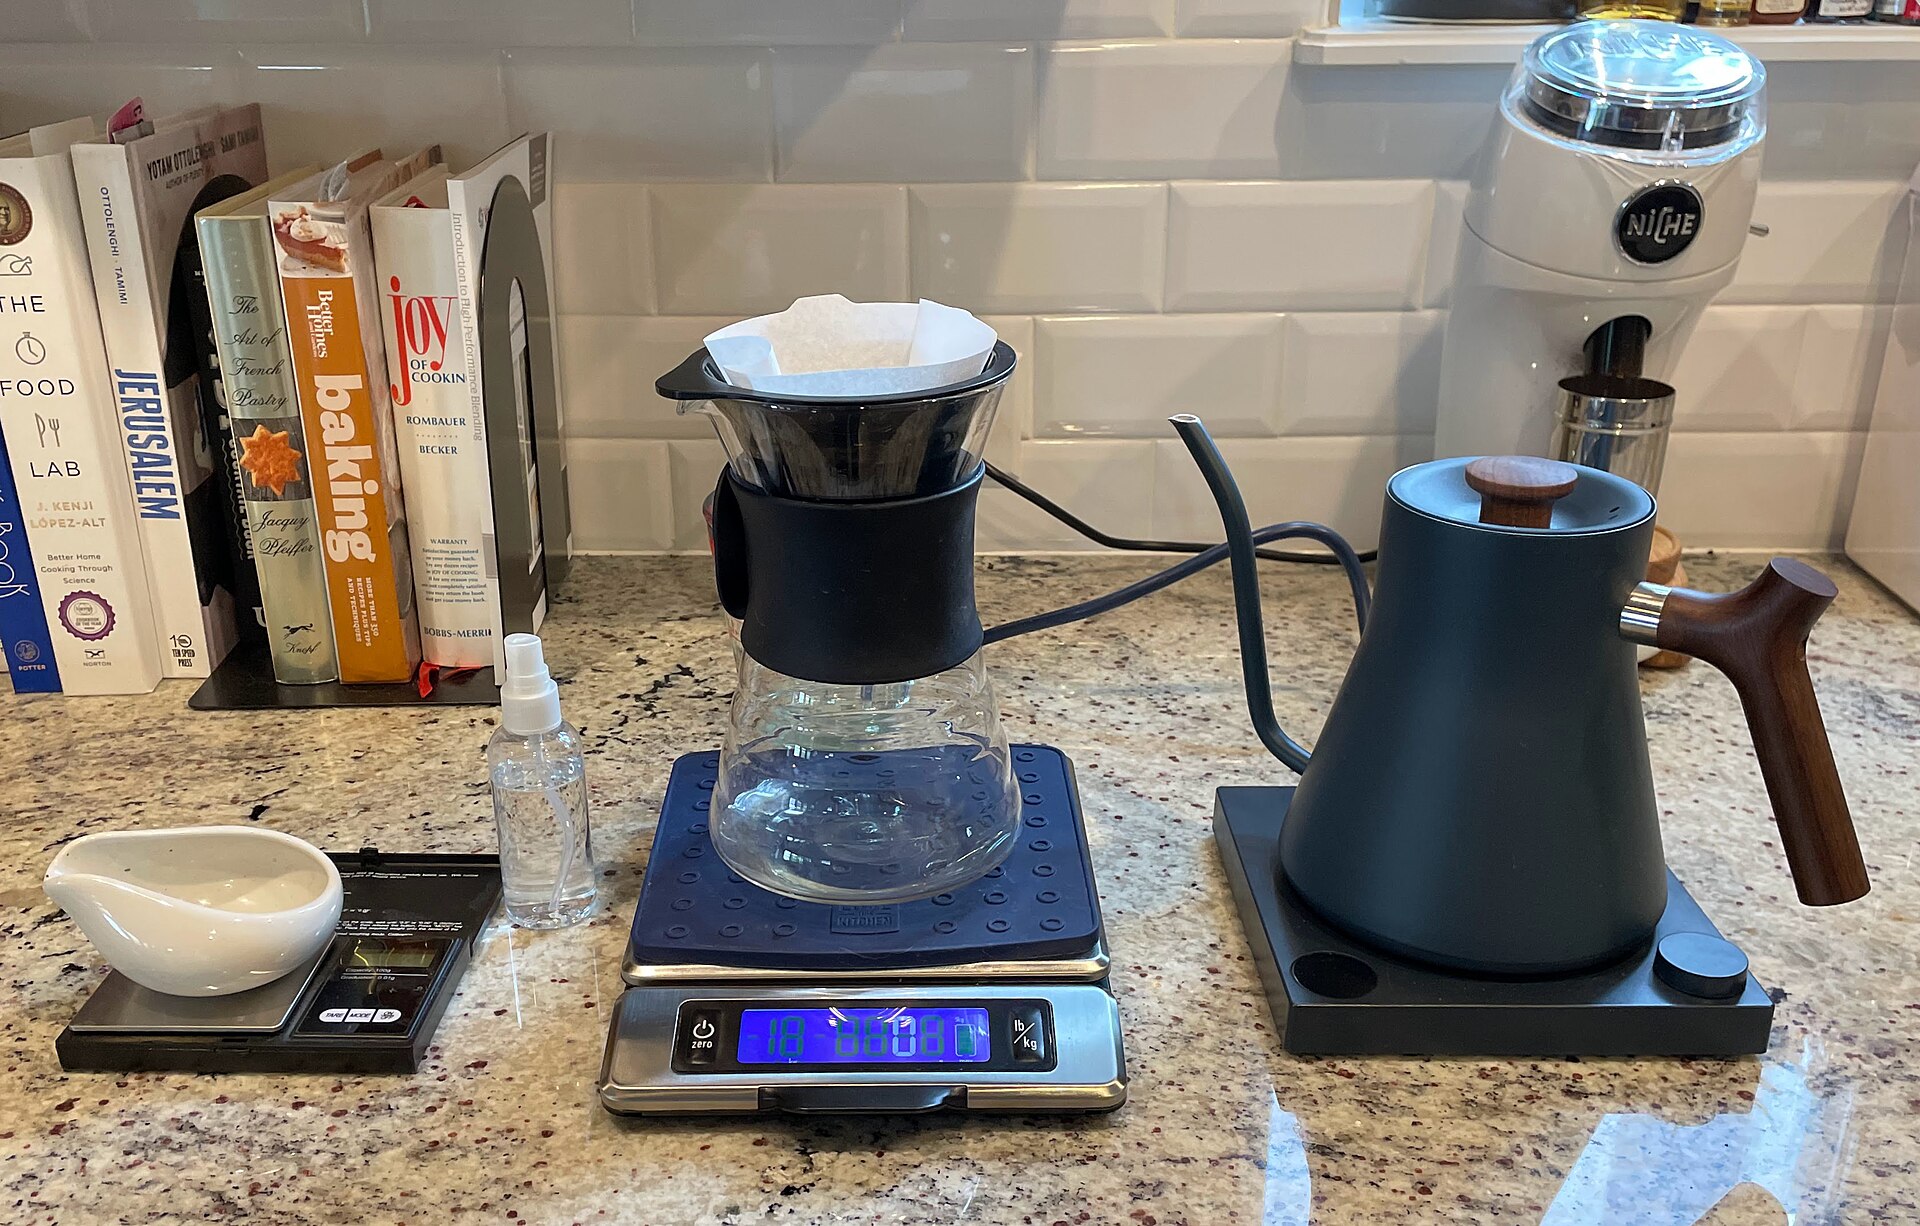
Ask ten coffee lovers how much coffee to use and you may get ten answers. A scoop, two spoons, “a good handful”. The truth is simpler. The best cup starts with the right coffee to water ratio. Get that number right and every other step gets easier. Get it wrong and even great beans can taste thin, sour or harsh. In this guide you will learn what the ratio means, why grams beat spoons, and the right numbers for pour over, French press, AeroPress, espresso, the Italian moka pot and cold brew. You will also find a simple chart to save and a few fixes for when the cup tastes off. What Is the Coffee to Water Ratio? The coffee to water ratio is the weight of ground coffee compared with the weight of water you brew it with. We write it as 1:16, for example. That means 1 gram of coffee for every 16 grams of water. So 20 g of coffee needs 320 g of water. Why grams and not millilitres? For water it makes no real difference, since 1 ml of water weighs about 1 g. But for coffee it matters a lot. A spoon of light roast weighs more than a spoon of dark roast, because dark beans lose more mass in the roaster. A fine grind also packs more tightly than a coarse one. A scale cuts out all of that guesswork. The ratio controls strength: how much coffee ends up dissolved in your cup. More coffee per gram of water gives a stronger, heavier drink. Less coffee gives a lighter, more delicate one. It works hand in hand with grind size, brew time and water temperature, which control how much flavour you pull from each grain. The Golden Ratio: A Good Place to Start For filter coffee, most baristas start somewhere between 1:15 and 1:17. The Specialty Coffee Association (SCA) has long used a “Golden Cup” standard of about 55 g of coffee per litre of water. That works out close to 1:18. Many home brewers find 1:16 a happy middle ground: rich enough to taste the origin, light enough to stay clean and sweet. Think of these numbers as a starting line, not a rule. Your taste, your beans and your gear all play a part. A fruity washed Ethiopian may shine at 1:17. A heavy, chocolatey Brazil may feel better at 1:15. The point of a ratio is that you can repeat a cup you love, then change one thing at a time. Coffee to Water Ratio Chart by Brew Method Here are reliable starting points for the most common methods. Each one brews in a different way, so each needs its own number. Pour Over and Drip Pour over gives you the most control, so it is the best method to learn ratios with. Start at 1:16 and pour slowly in stages. If you are new to it, our V60 guide walks you through each pour. A thicker paper filter, like the one in a Chemex, often suits a slightly stronger ratio such as 1:15. French Press and AeroPress These are full immersion methods. All the coffee sits in all the water for the whole brew. Because of that, they can take a little more coffee and a coarser grind without turning bitter. Our French press guide uses 1:15 as its base. The AeroPress is very flexible: some recipes brew a strong shot and then top it up with hot water. Espresso and the Italian Moka Pot Espresso is a different world. Here the ratio compares the dry dose with the liquid espresso in the cup, not the water you start with. A classic shot sits near 1:2. A ristretto, the short “restricted” shot Italians love, goes tighter, around 1:1 to 1:1.5. A lungo, the “long” shot, runs closer to 1:3. The moka pot is the small stovetop brewer found in almost every Italian home. It does not really let you play with the ratio, since the basket and boiler set the dose for you. Just fill the basket level, without pressing, and fill the water to just below the safety valve. The moka pot guide covers the rest of the method. Cold Brew Cold brew steeps in cold water for 12 to 24 hours. Many people make a strong concentrate at 1:4 to 1:8, then dilute it with water or milk to taste. It keeps well in the fridge for a few days. See our cold brew guide for the full recipe. How to Measure Your Coffee to Water Ratio You only need one tool: a kitchen or coffee scale that reads to 1 g, or better to 0.1 g. A scale with a built-in timer, like the Hario V60 Drip Scale, helps you track both weight and brew time at once. Then follow these steps: No scale yet? A level tablespoon of whole beans weighs roughly 5 to 7 g, so two level spoons for each 200 ml mug lands you near the right zone. It is fine for a start, but you will taste the difference once you weigh. How to Adjust the Ratio to Your Taste Once you have a base recipe, taste and tweak. Change only one thing per brew so you know what made the difference. Keep in mind that strength and extraction are not the same thing. The ratio sets strength. Grind, time and heat set extraction. A cup can be strong and sour, or weak and bitter. Learning to tell them apart is the fastest way to brew better coffee at home. Final Thoughts A good coffee to water ratio is the quiet secret behind almost every great cup. Start at 1:16 for filter, 1:15 for French press and 1:2 for espresso. Weigh your coffee, write down what you did, and adjust one step at a time. In a week or two you will brew cups you can repeat on purpose. To read more about the craft, the Wikipedia page on coffee

V60 vs Chemex: 5 Differences to Help You Choose Your Pour-Over
V60 vs Chemex: filters, flavour, flow, batch size and ease of use compared. Which pour-over brewer suits your taste and your mornings.
Moka Pot vs Espresso Machine: 6 Real Differences Before You Choose
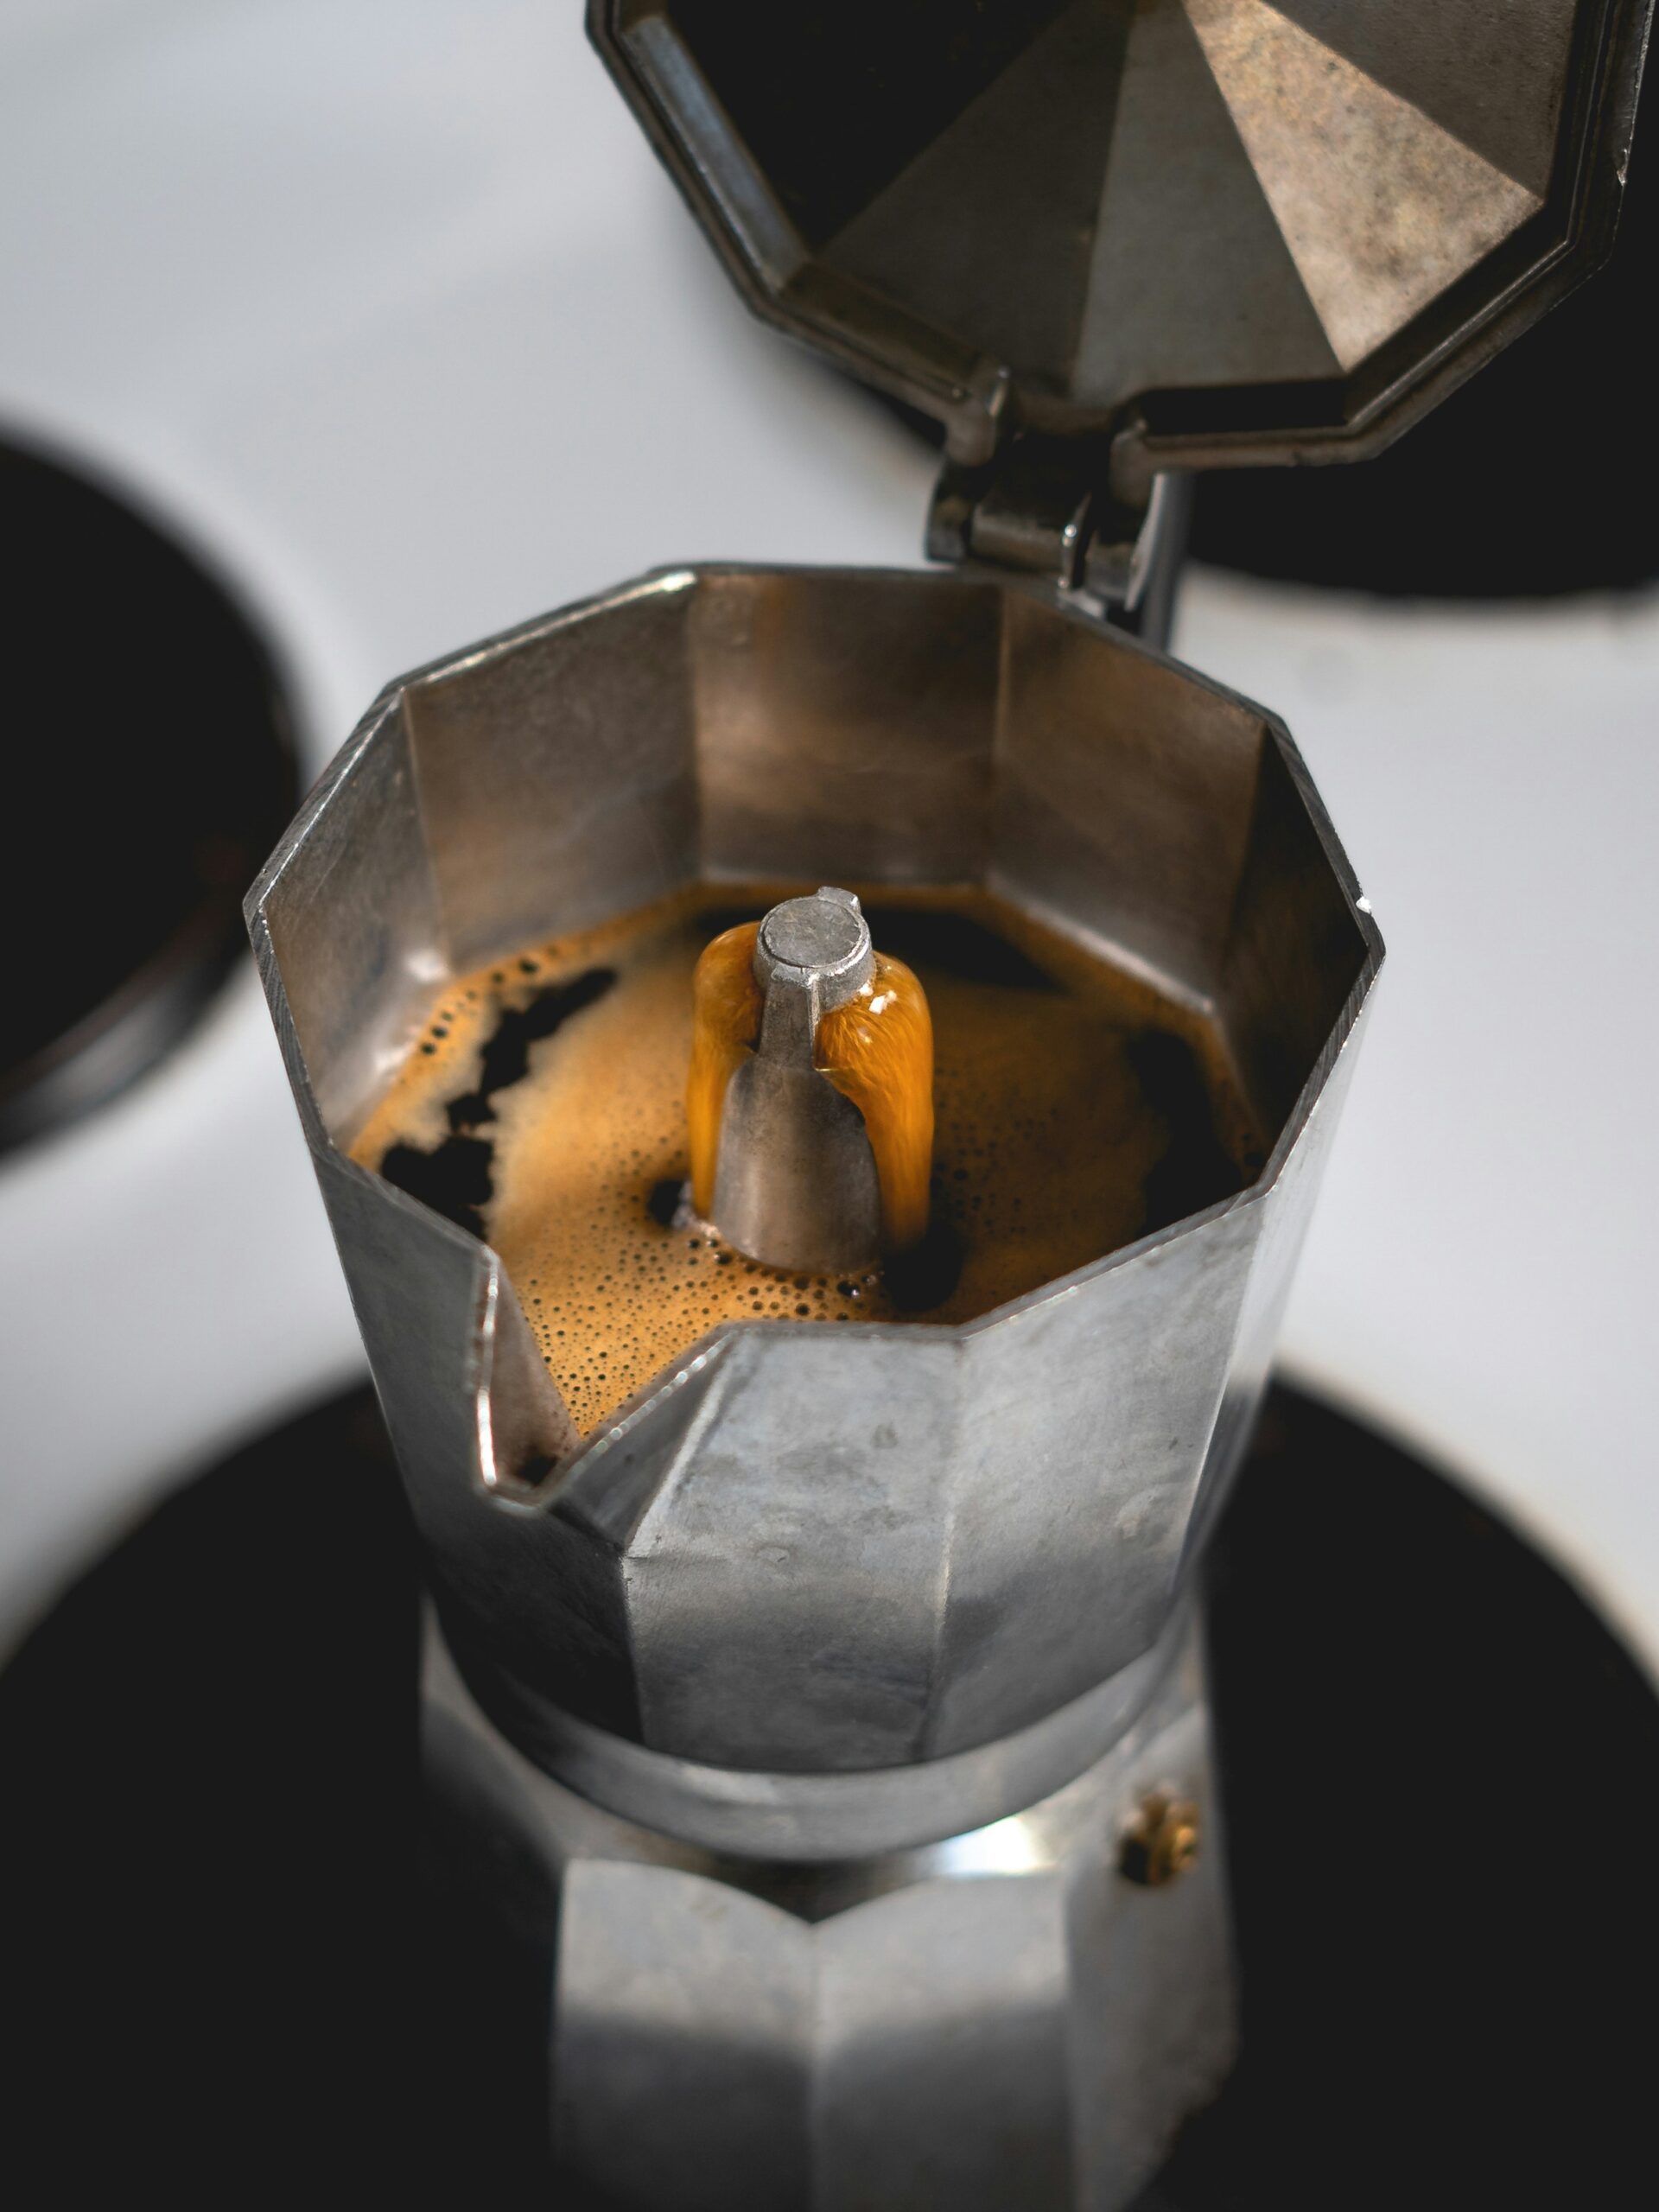
Moka pot vs espresso machine: pressure, taste, crema, cost, effort and milk drinks compared, so you can choose the right way to make Italian coffee at home.

Best Moka Pots: 6 Models Worth Buying and Who Each One Is For
The best moka pots compared: classic aluminium, stainless steel for induction, crema-makers and design icons. Who each model is for and what to check before you buy.